Deploying a PHP Application with MySQL on AWS vs Nimbuz

When it comes to deploying a PHP application in the cloud, two options stand out: AWS EC2 and Nimbuz Platform. Both are powerful, but they take very different approaches. One focuses on flexibility, control and complex to deploy. while the other is designed for simplicity, speed and very easy to deploy.
Deploy a PHP Application on AWS EC2 with Apache & MySQL
Deploying a PHP application on AWS is very complex and more command needs to deploy in AWS. By the end of this guide, you’ll have a running PHP + Apache + MySQL application hosted on an Ubuntu EC2 instance.
Step 1: Launch an EC2 Instance
- Sign in to your AWS Console and go to EC2.
- Click Launch Instance and configure the following:
- AMI: Ubuntu Server 22.04 LTS
- Instance type:
t3.micro(Free-tier friendly) - Key pair: Create/download
.pemfile - Security Group: Add rules for
- SSH (TCP 22) → Your IP
- HTTP (TCP 80) → Anywhere
- HTTPS (TCP 443) → Anywhere
- Launch the instance and note the Public IPv4 address.

Step 2: Install Apache, PHP, and MySQL
SSH into your EC2 instance:
sudo apt update
sudo apt install -y apache2 php libapache2-mod-php php-mysql mysql-server unzip
Enable Apache:
sudo systemctl enable apache2
sudo systemctl start apache2

Step 3: Configure the MySQL Database
sudo mysql -u root
Run the following inside MySQL:
CREATE DATABASE studentdb;
CREATE USER 'myappuser'@'localhost' IDENTIFIED BY 'mystrongpassword@123!';
GRANT ALL PRIVILEGES ON studentdb.* TO 'myappuser'@'localhost';
FLUSH PRIVILEGES;
EXIT;
mysql -u myappuser -p studentdb
SELECT * FROM students;
EXIT;
Step 4: Upload Your PHP Application to EC2
From your local machine, upload your PHP app ZIP file:
scp -i /path/to/your-key.pem ecommerce-b.zip ubuntu@<EC2-PUBLIC-IP>:/home/ubuntu/After upload, verify inside EC2:
ls -l /home/ubuntu/Step 5: Create Apache Web Root
sudo mkdir -p /var/www/html/ecommerce
sudo chown -R $USER:$USER /var/www/html/ecommerce
Move index.php and other files to web root
sudo mv /home/ubuntu/ecommerce-b/* /var/www/html/ecommerce/
sudo chown -R www-data:www-data /var/www/html/ecommerce
sudo chmod -R 755 /var/www/html/ecommerce
Step 6: Access Your Application
You can access the PHP application using the following URL.
http://<EC2-Public-IP>/ecommerce/index.php
That’s it! You’ve successfully deployed a PHP application on AWS EC2 with Apache and MySQL.
Deploying PHP Application with Mysql on Nimbuz Platform
Deploying your application doesn’t have to be complicated. With Nimbuz Platform, you can set up your environment, connect your code, and go live in just a few clicks - no long command lines. Everything can be handled end-to-end from the UI.
Sign up or log in to Nimbuz platform
Here’s a simple, step-by-step guide to get your app running on Nimbuz:
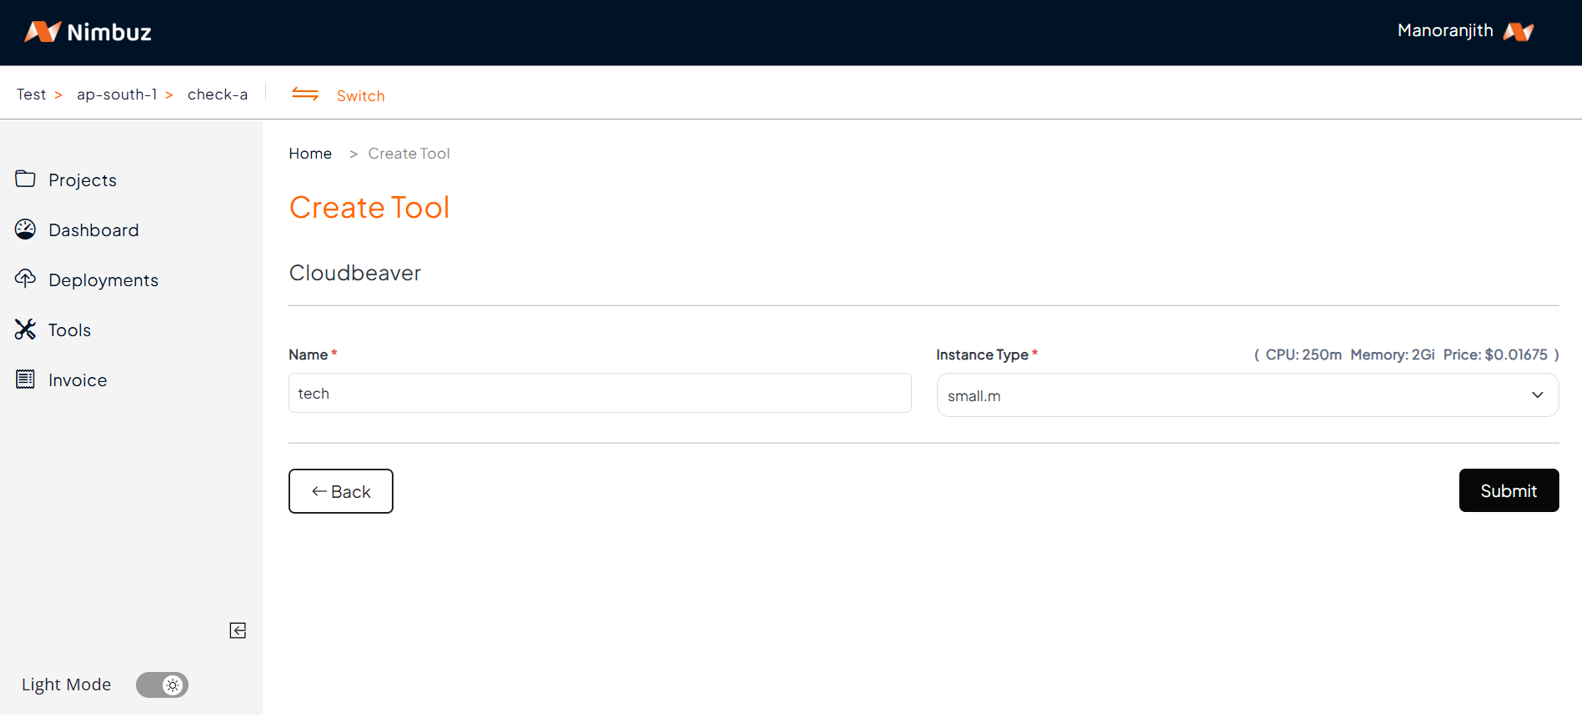
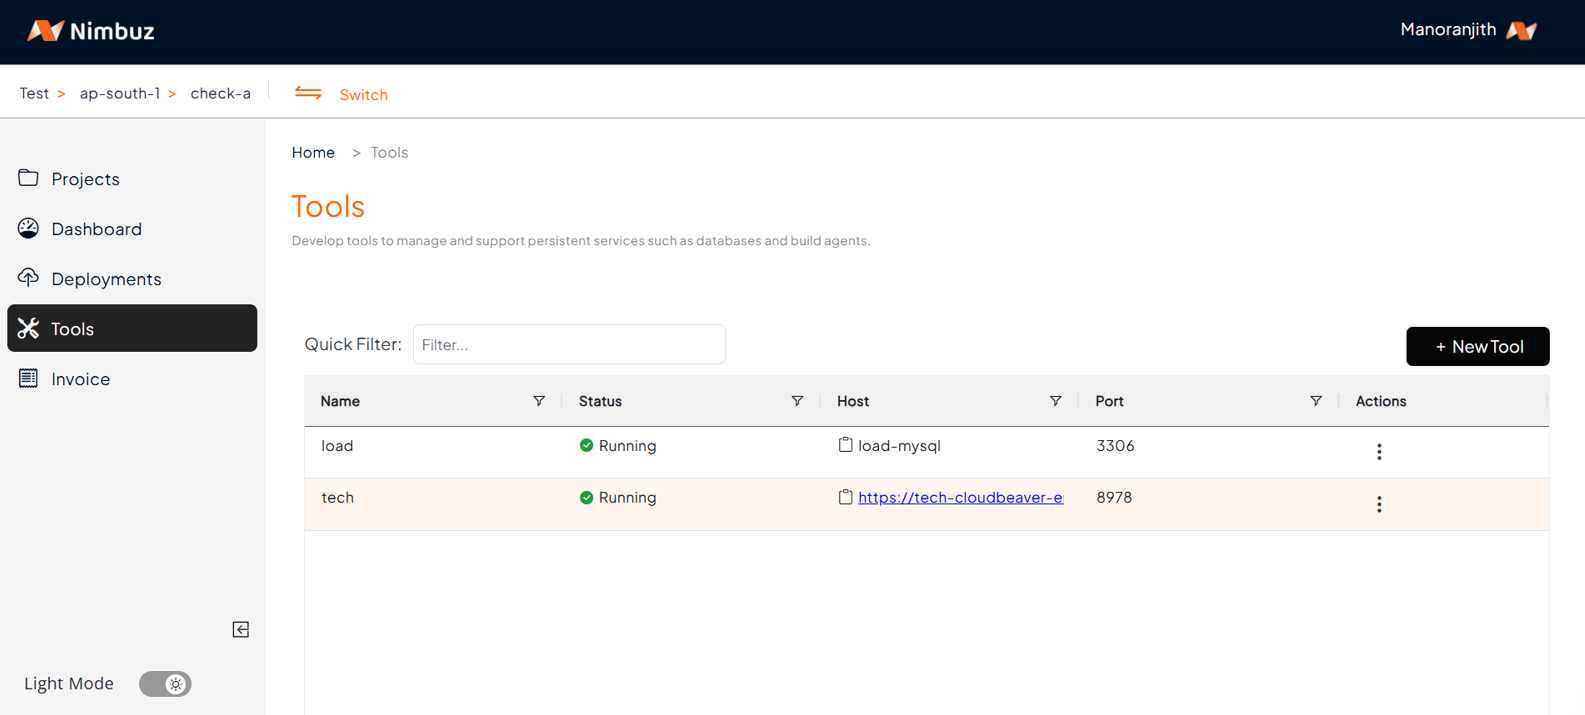
Step 1: Install CloudBeaver Tools
Install cloudbeaver from New Tool section.
Nimbuz comes with CloudBeaver built in, making database management super easy. You can query, explore, and monitor your data straight from the CloudBeaver UI.
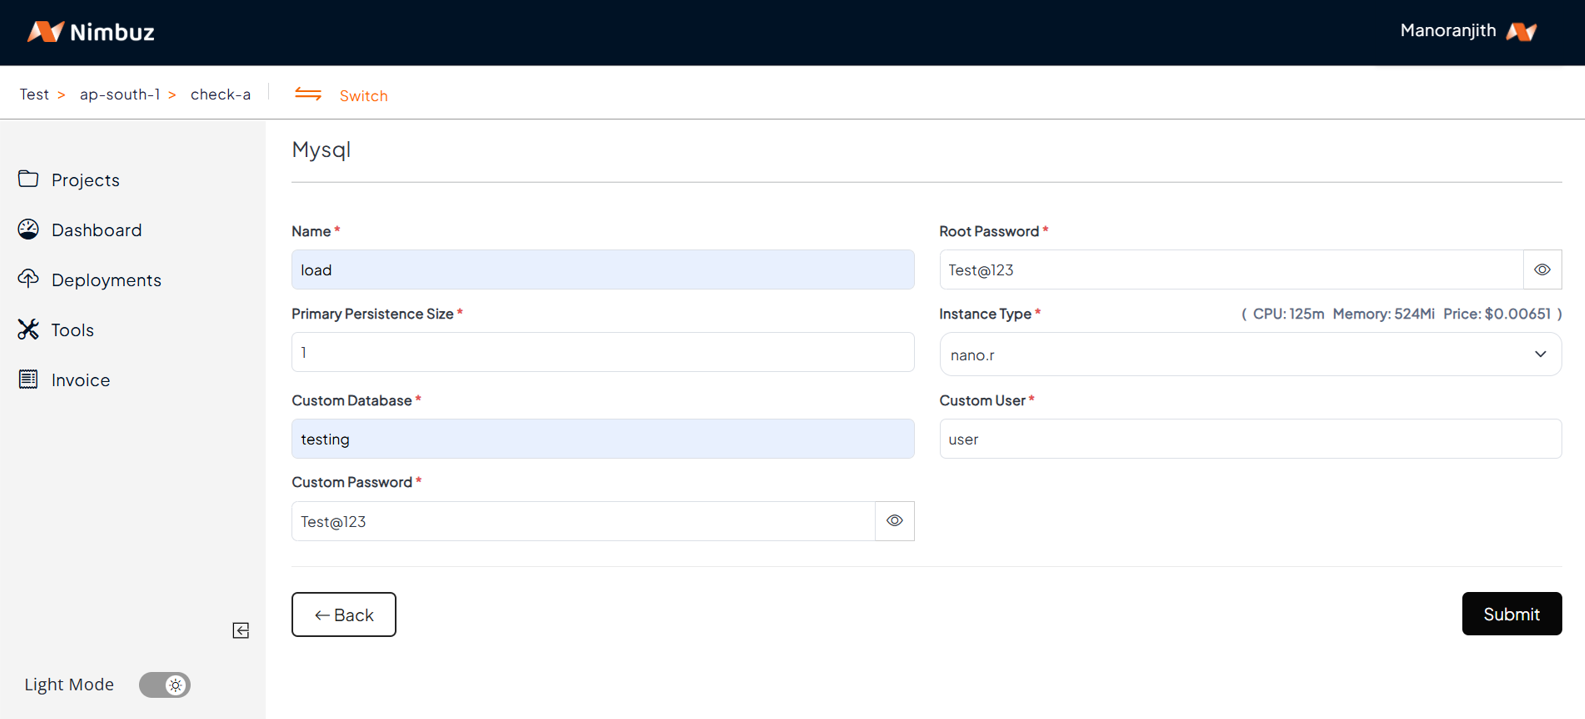
Step 2: Add MySQL Tools
From the New Tool section, add MySQL as your database. Once installed, you can manage everything using the CloudBeaver UI.
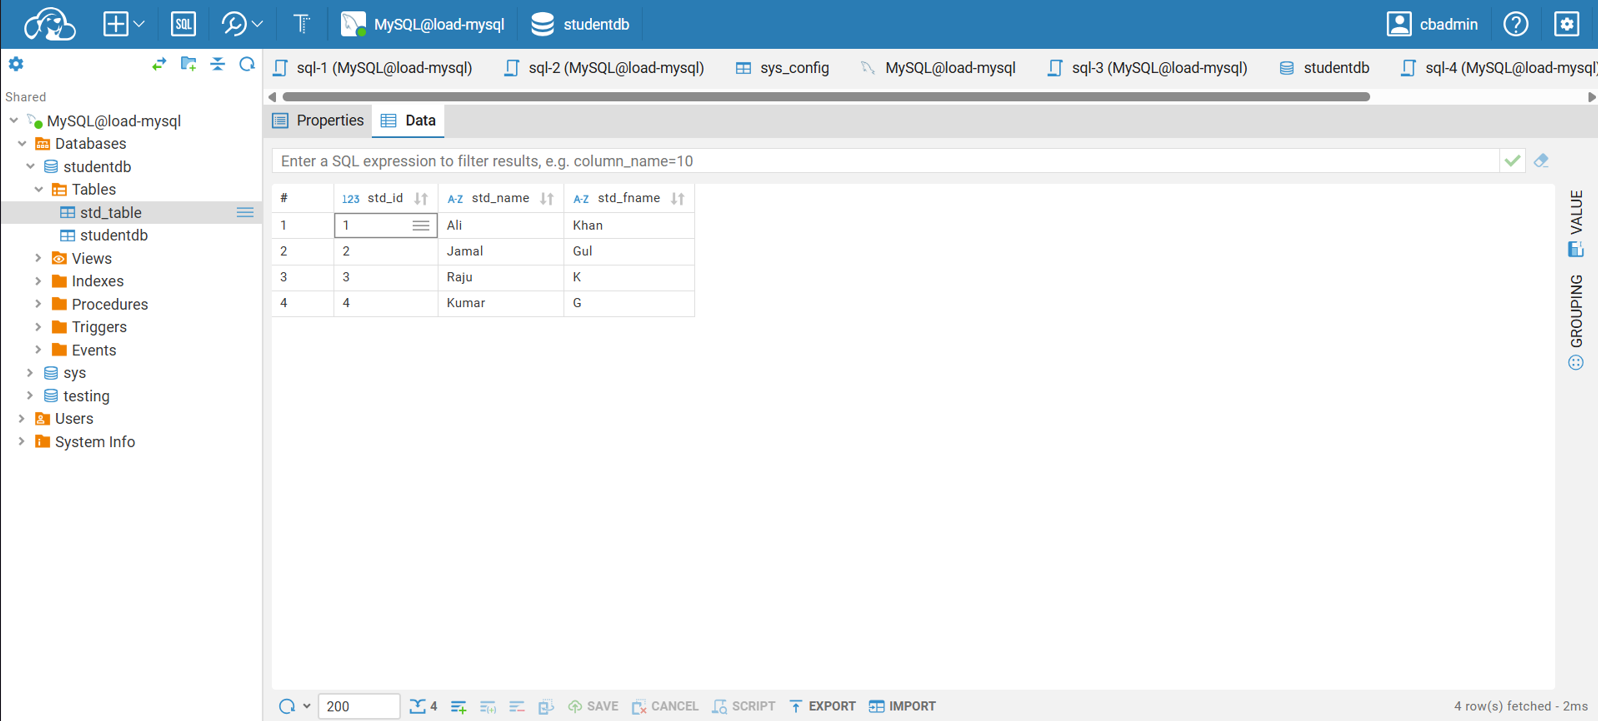
Step 3: Click the CloudBeaver Host Link and Setup the DB in CloudBeaver UI
- Go to Installed CloudBeaver Tools.
- Click the CloudBeaver Host Link → it opens the CloudBeaver UI.
- configure the mysql in CloudBeaver UI.
- Here you can query, create tables, create schemas and manage everything visually.
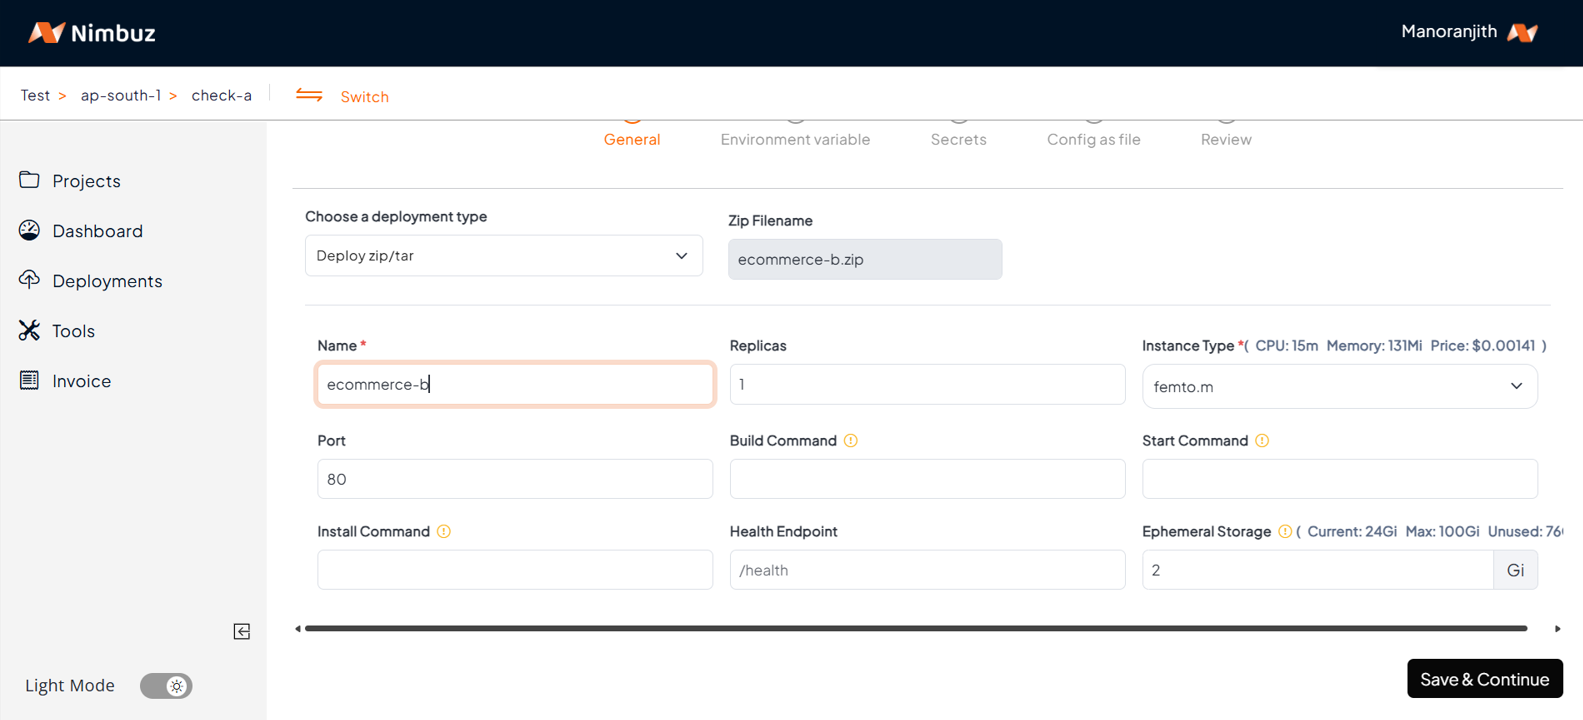
Step 4: Select Deployment
- Choose a deployment type (Connect Your Code Repository):
Now let’s bring in your app code:
- Deploy from GitHub repo / Deploy from GitLab repo → Connect your account, pick your repo and branch, and you’re ready to deploy.
- Deploy zip/tar → Just upload zip file of your code.
Configure the port as per your app configs and let Nimbuz handle the rest. No commands, no hassle - your code runs automatically.
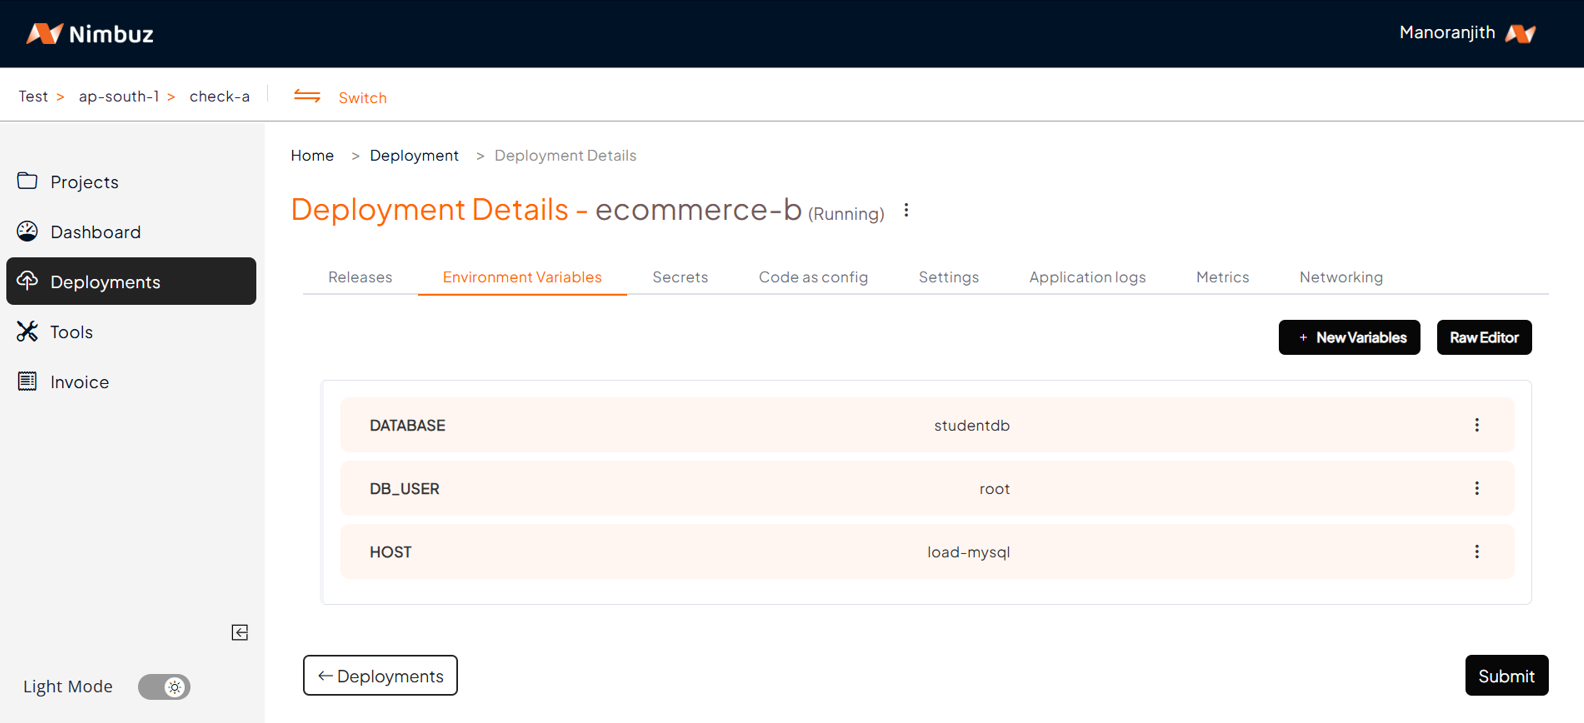
- Set Environment Variables:
Time to set up the environment variables your app needs.
In the Raw Editor, add values like this:
DATABASE="studentdb"
DB_USER="root"
HOST="load-mysql"
These variables make sure your app connects to the right database and runs correctly
- Manage Secrets:
Secrets are sensitive values like usernames and passwords. Nimbuz stores them securely so your credentials are safe while your app runs seamlessly.
PASSWORD="Test@123"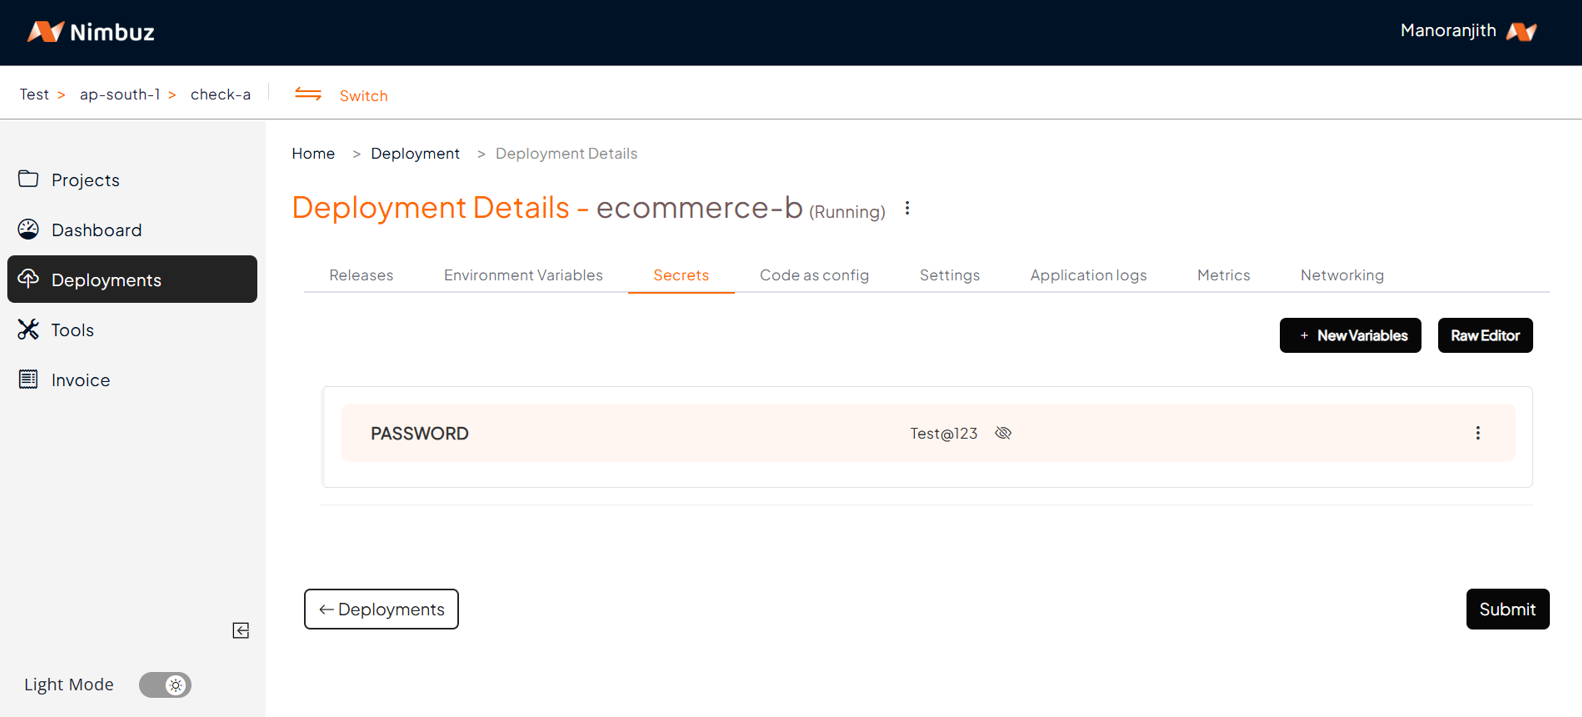
- Review & Deploy:
You’re almost there!
Review all your settings from the previous steps. If everything looks good, click Submit. Then, Nimbuz will take care of the deployment, and your app will be live in the cloud.
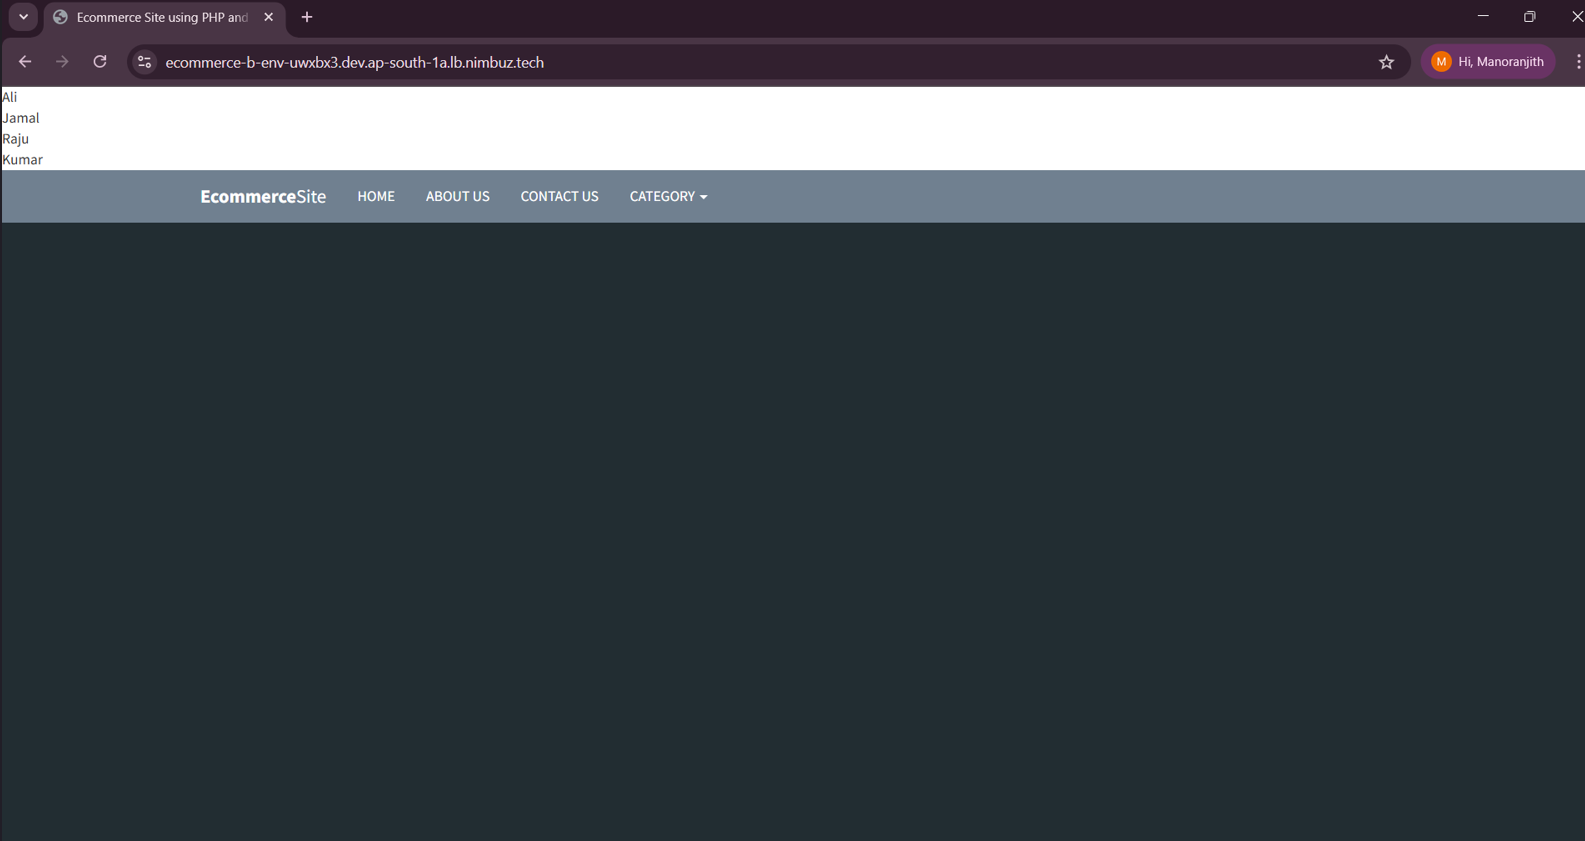
Step 5: Access Your Application
After the deployment is complete, check the Networking tab to view your app’s endpoint.
- Click Generate Domain to get a Domain URL. You can then access the application using this URL.
- Custom Domain: If you prefer, you can map your own custom domain.
That’s it! You’ve successfully deployed a PHP application with MySQL on Nimbuz Platform.
Hosting & Endpoint Setup Compared: AWS vs Nimbuz
AWS (EC2):
- Developers must manually configure hosting: set up public IP, domain, load balancer, and routing rules.
- SSL setup requires extra steps (e.g., ACM certificate, binding it to the load balancer).
- More control but higher complexity.
Result: Time-consuming setup with more chances for misconfiguration.
In short: Nimbuz is plug-and-play, while AWS offers flexibility but needs more manual setup.
Nimbuz:
- When you deploy an app, Nimbuz automatically generates a public URL (endpoint).
- You can enable/disable hosting directly from the dashboard.
- SSL (HTTPS) can be toggled on without setting up certificates manually.
Result: Zero-effort to make your app accessible on the internet
Nimbuz Platform vs AWS EC2: Which is Easier for Deploying a PHP Application?
| Feature / Step | AWS EC2 | Nimbuz Platform |
|---|---|---|
| Database Management |
Install & configure MySQL via command line
|
Add MySQL tools & configure from UI
|
| Environment Variables & Secrets |
Manual config
|
Handled from UI
|
| Deployment Process |
⏳ ~30–45 mins (longer for beginners)
|
⏳ ~5–10 mins
|
| Ease of Use |
|
|
| Best For | Developers / teams needing full control and custom infrastructure. | Developers / teams or startups who want apps live quickly with minimal setup. |
| Deployment Time | ~30–40 minutes (typical) | ~5–10 minutes (typical) |
| Conclusion | AWS EC2 = Flexibility + Complexity | Nimbuz Cloud = Simplicity + Speed |
If you’re deploying an application with simple infrastructure needs and just want to get your app online quickly, the Nimbuz Platform is the best choice for ease of use.