Deploying a Python Application on AWS vs Nimbuz

When it comes to deploying a Python application in the cloud, two options stand out: AWS EC2 and Nimbuz Platform. Both are powerful, but they take very different approaches. AWS EC2 offers flexibility and control but requires a more complex, manual deployment process. In contrast, Nimbuz Platform is built for simplicity and speed, allowing you to deploy your app easily with just a few clicks.
Deploy a Python Application on AWS EC2
Deploying a Python application on AWS EC2 is powerful and flexible, but it requires multiple manual steps. From setting up the server to configuring HTTPS, you’ll need to run several commands and manage the environment yourself. Here’s the complete guide:
Step 1: Launch an EC2 Instance
- Log in to AWS Console.
- Navigate to EC2 Dashboard.
- Click Launch Instance.
- Choose an OS:Ubuntu 22.04 LTS
- Choose instance type:
t2.micro(Free Tier eligible) - Create or select a Key Pair (download
.pemfile). - Configure Security Group:Allow:SSH (Port 22)HTTP (Port 80)HTTPS (Port 443) (optional)
- Launch the instance.
Step 2: Connect to EC2 via SSH
Open your terminal:
ssh -i your-key.pem ubuntu@your-public-ip
Step 3: Update Server
sudo apt update
sudo apt upgrade -y
Step 4: Install Python & Required Packages
sudo apt install python3 python3-pip python3-venv -y
sudo apt install nginx -y
Step 5: Upload Your Python Application
Clone from Git
sudo apt install git -y
git clone https://github.com/username/your-python-app.git
cd your-python-app
Step 6: Setup Virtual Environment
cd your-python-app
python3 -m venv venv
source venv/bin/activate
Install dependencies:
pip install -r requirements.txt
Install Gunicorn:
pip install gunicorn
Step 7: Run Application with Gunicorn
gunicorn --bind 0.0.0.0:8000 app:app
app→ file name
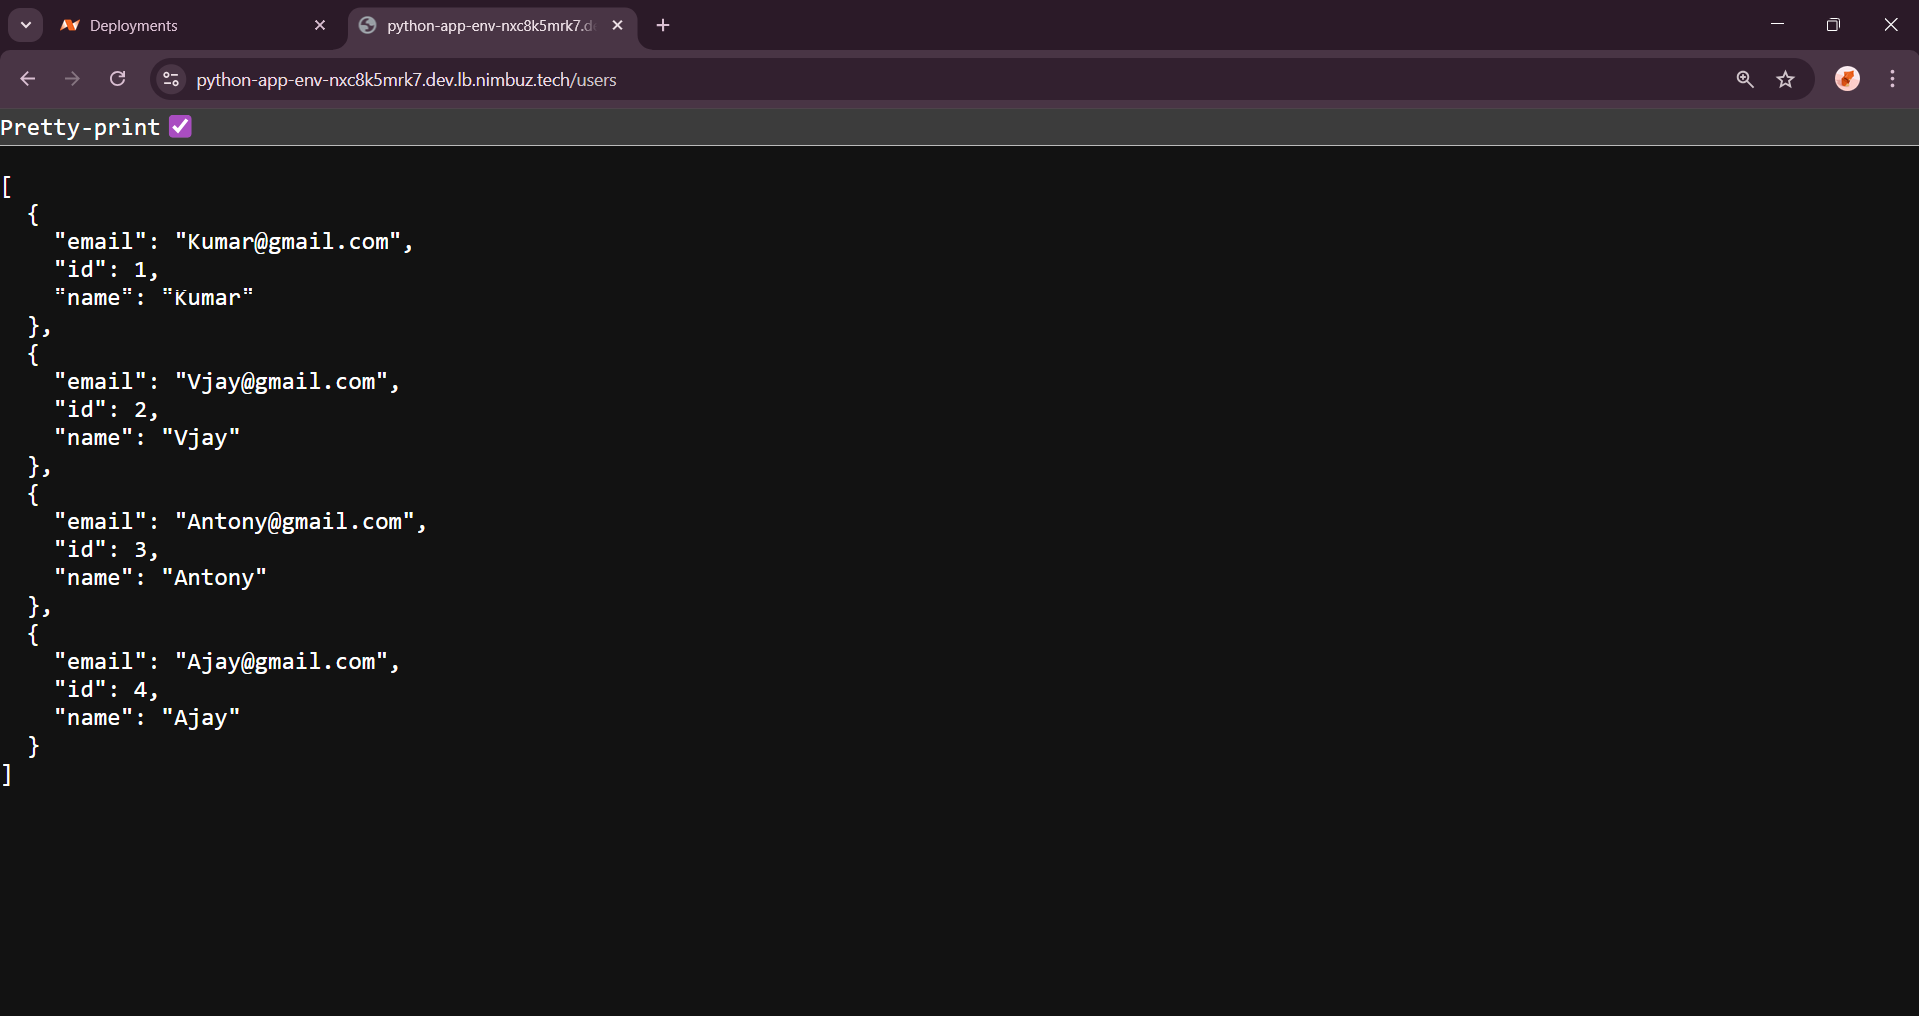
Test:
http://your-public-ip:8000
Step 8: Configure Gunicorn as a Systemd Service
Create service file:
sudo nano /etc/systemd/system/pythonapp.service
Add:
[Unit]
Description=Gunicorn instance
After=network.target

[Service]
User=ubuntu
Group=www-data
WorkingDirectory=/home/ubuntu/your-python-app
Environment="PATH=/home/ubuntu/your-python-app/venv/bin"
ExecStart=/home/ubuntu/your-python-app/venv/bin/gunicorn \
          --workers 3 \
          --bind unix:your-python-app.sock \
          app:app

[Install]
WantedBy=multi-user.target
Reload services:
sudo systemctl daemon-reload
sudo systemctl start pythonapp
sudo systemctl enable pythonapp
Check status:
sudo systemctl status pythonapp
Step 9: Configure Nginx as Reverse Proxy
Create Nginx config:
sudo nano /etc/nginx/sites-available/pythonapp
Add:
server {
    listen 80;
    server_name your-public-ip;

    location / {
        include proxy_params;
        proxy_pass http://unix:/home/ubuntu/your-python-app/your-python-app.sock;
    }
}
Enable config:
sudo ln -s /etc/nginx/sites-available/pythonapp /etc/nginx/sites-enabled
sudo nginx -t
sudo systemctl restart nginx
Step 10: Allow Nginx Through Firewall
sudo ufw allow 'Nginx Full'
You can now access your app at http://your-public-ip (Not secure).
Serve Python App Over HTTPS with SSL
The best practice for production is to run your app securely with HTTPS.
Additionally, we need to follow the following steps for the HTTPS connection.
Step 1: Install Certbot
sudo apt install certbot python3-certbot-nginx -y
Step 2: Run
sudo certbot --nginx -d your-domain.com
Deploy a Python Application on Nimbuz Platform
With Nimbuz, deploying a Python app is simple, fast, and completely UI-driven. No commands, no server setup, no headaches.
Sign up or log in to Nimbuz platform
Here’s a simple, step-by-step guide to get your app running on Nimbuz:
Nimbuz supports various databases such as MySQL, PostgreSQL, MongoDB, and Mssql.
If you are using a database, refer to this CloudBeaver blog to learn how to set it up and use it.
Step 1: Go to Deployments
- Log in or sign up on Nimbuz platform
- Navigate to the Deployments section.
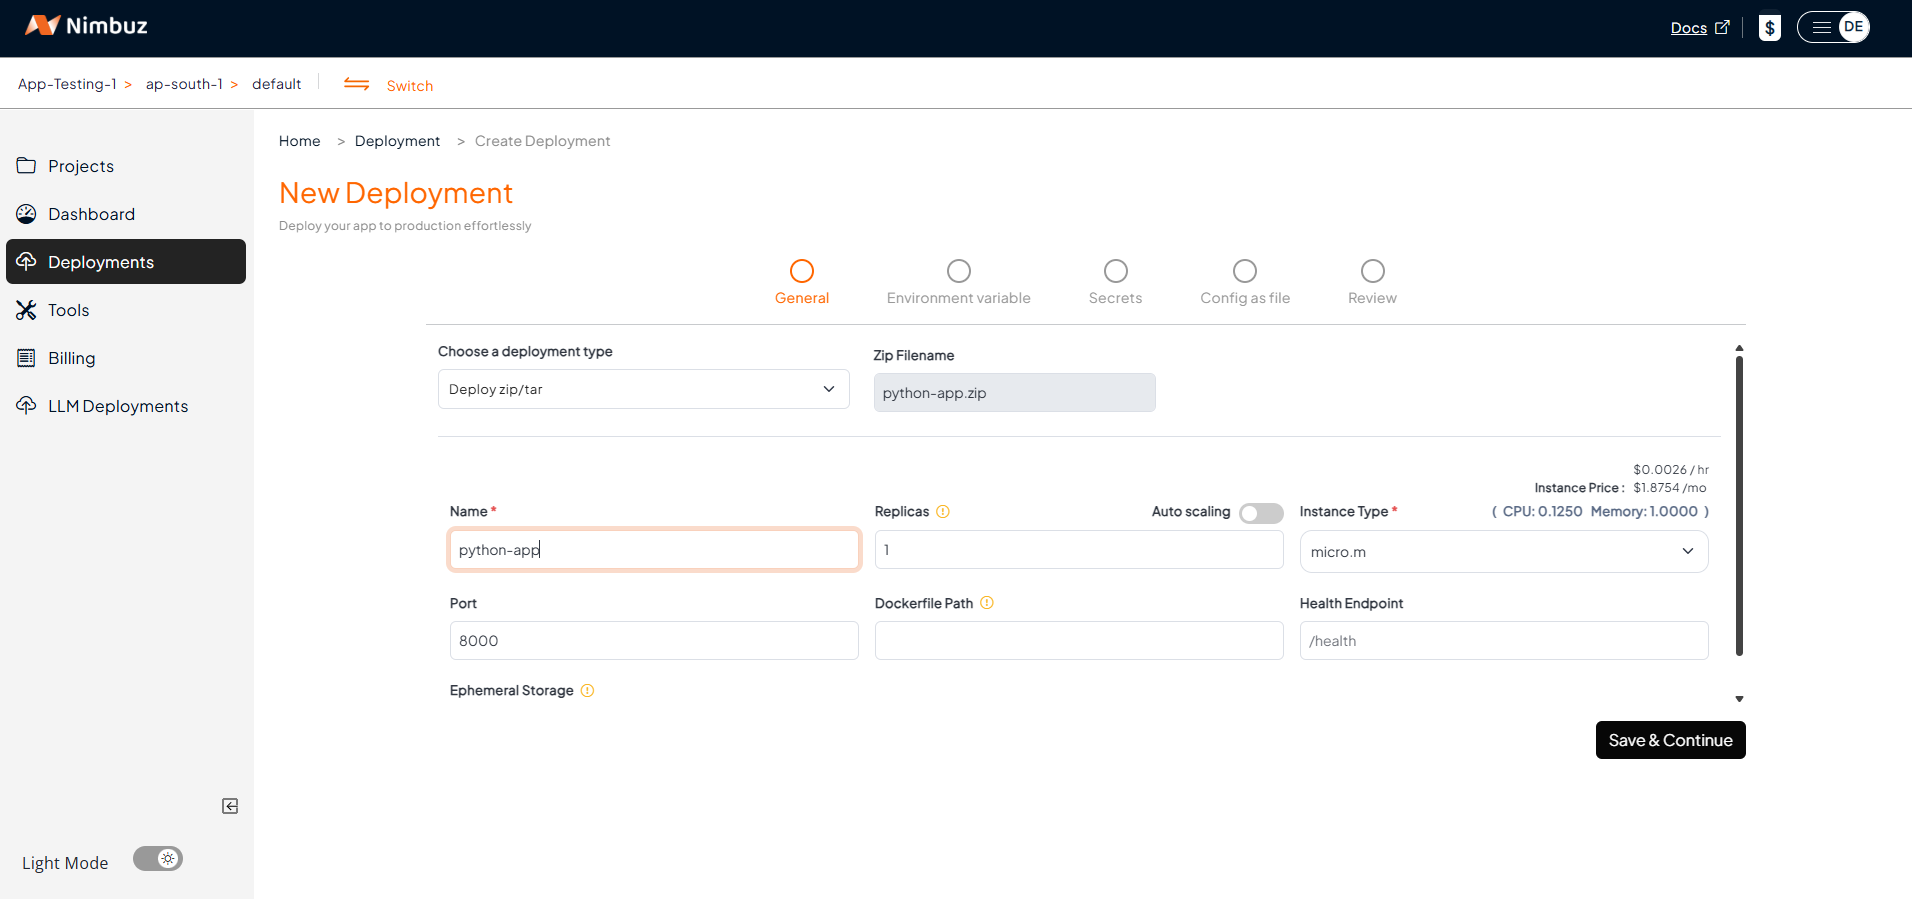
- Choose your deployment type:
- Connect Your Code Repository: GitHub or GitLab → Connect account → Pick repo and branch.
- Upload Zip/Tar File: Just upload your code.
- Configure the app port and instance type.
- Set Environment Variables in the Raw Editor
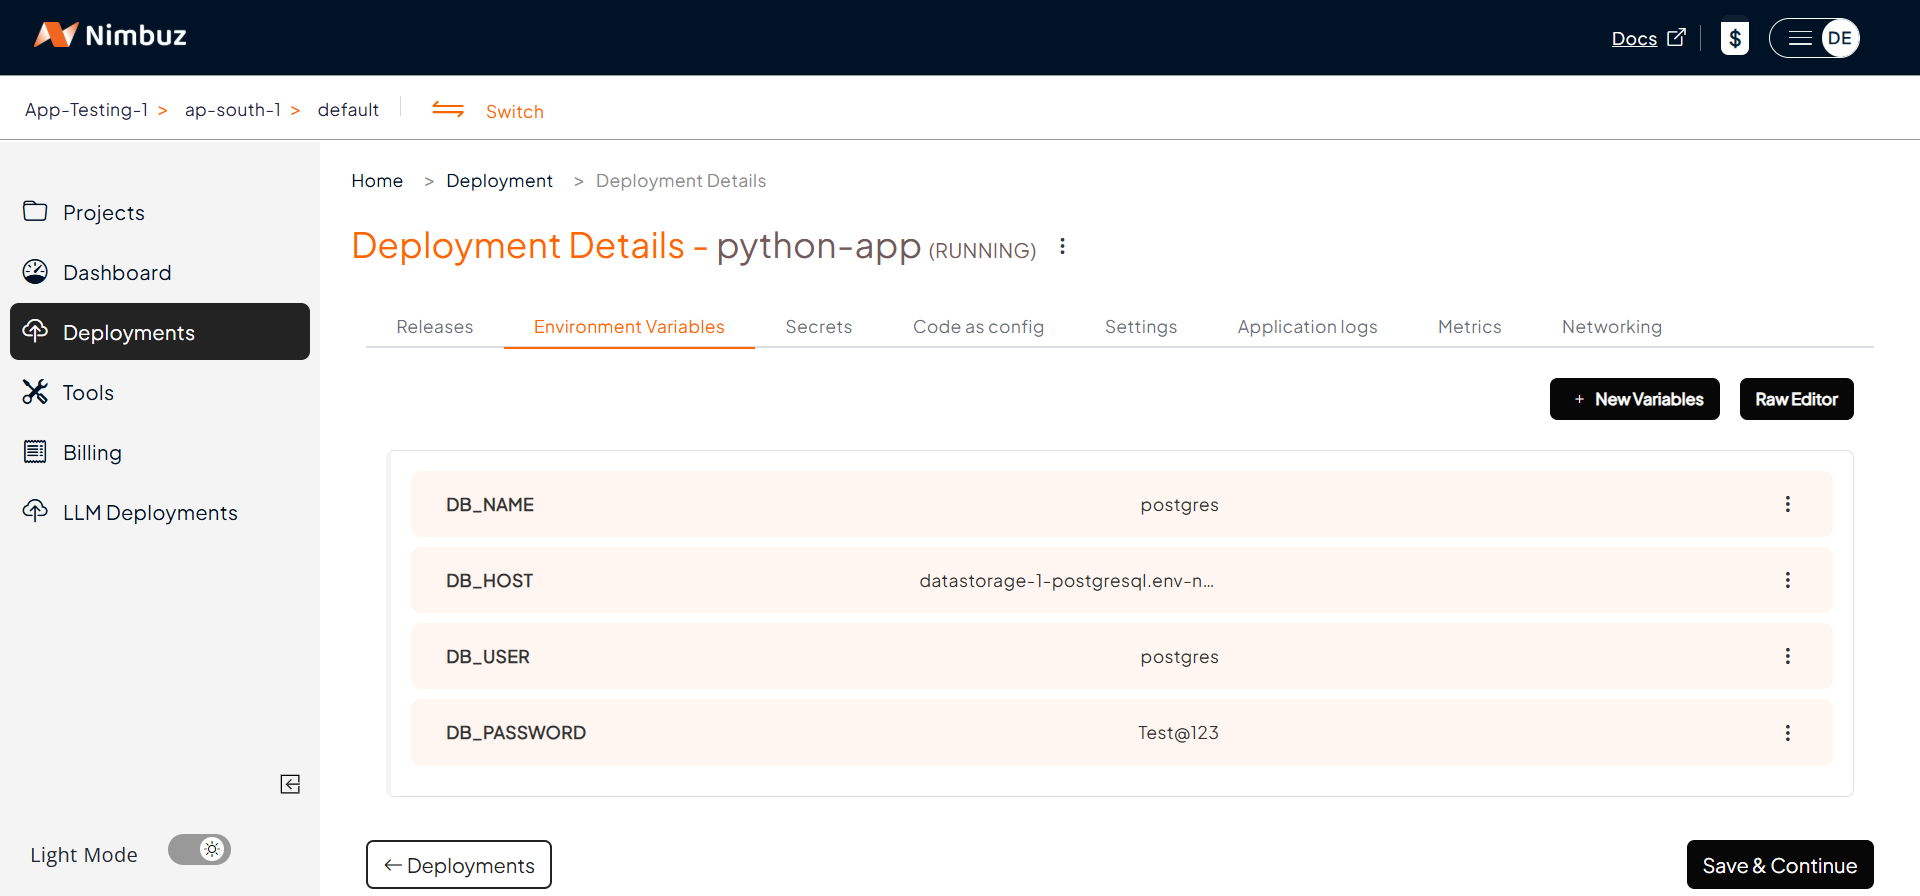
- Let Nimbuz handle the deployment automatically.
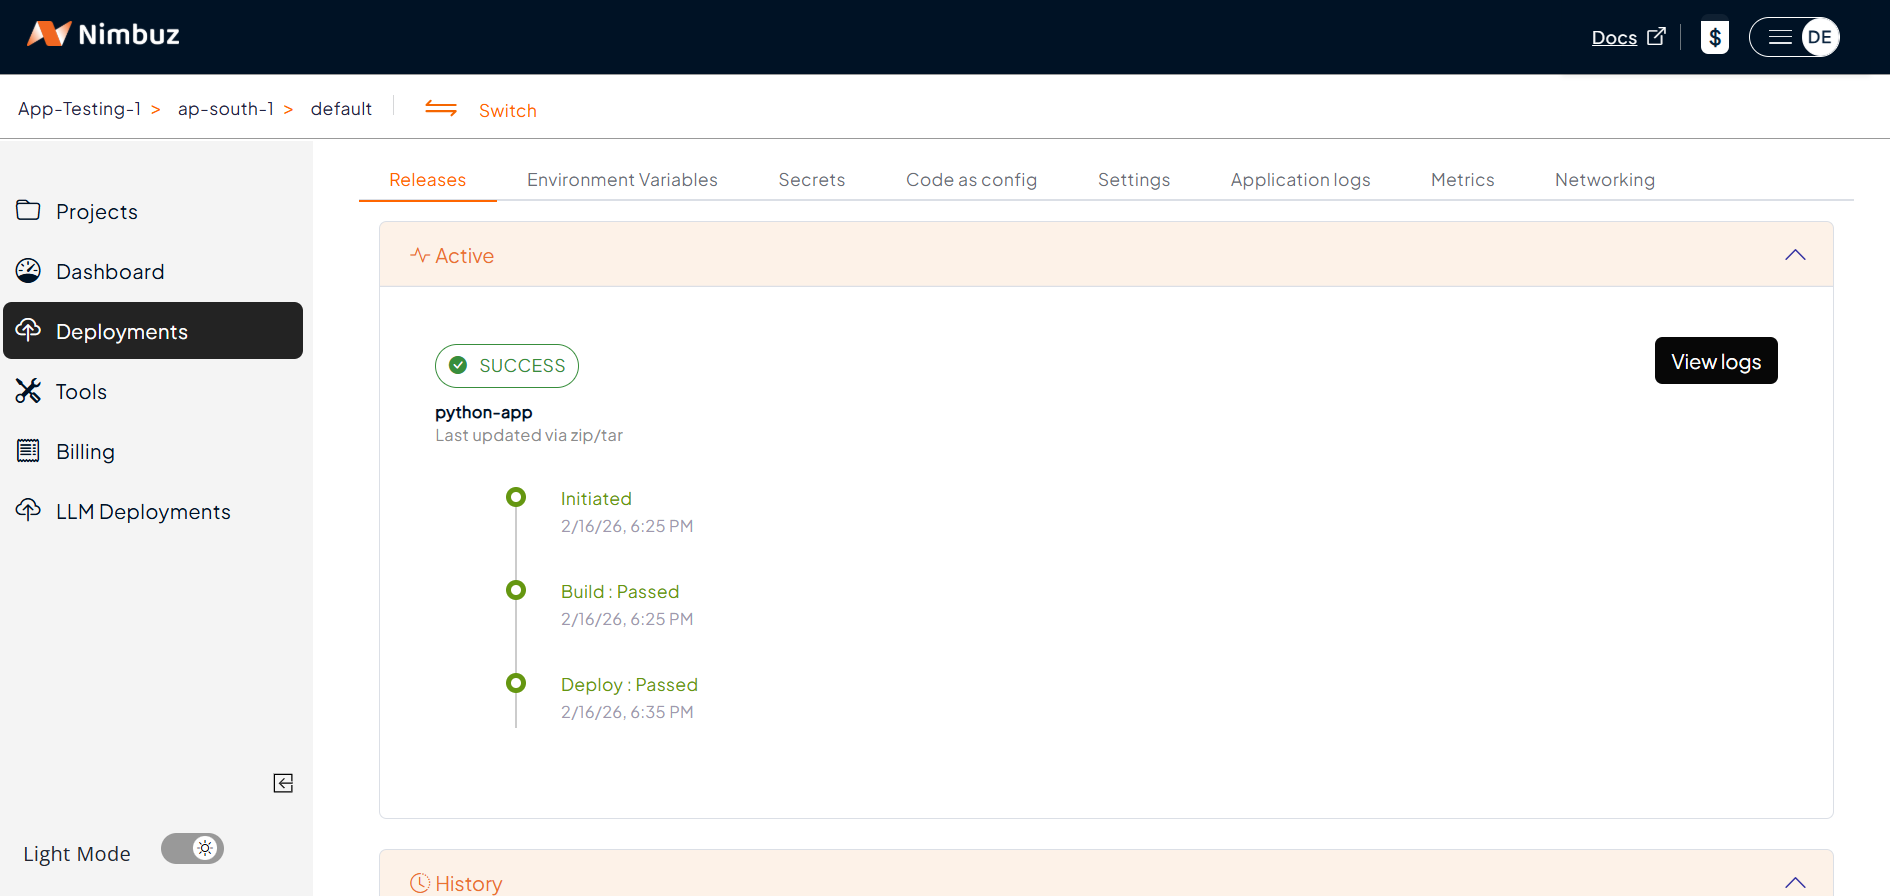
Step 2: Review & Deploy
- Click Submit - Nimbuz provisions the environment, deploys your app, and it's live instantly.
Step 3: Monitor Your App
- View logs, status and recent releases directly in the UI.
- No SSH or terminal required.
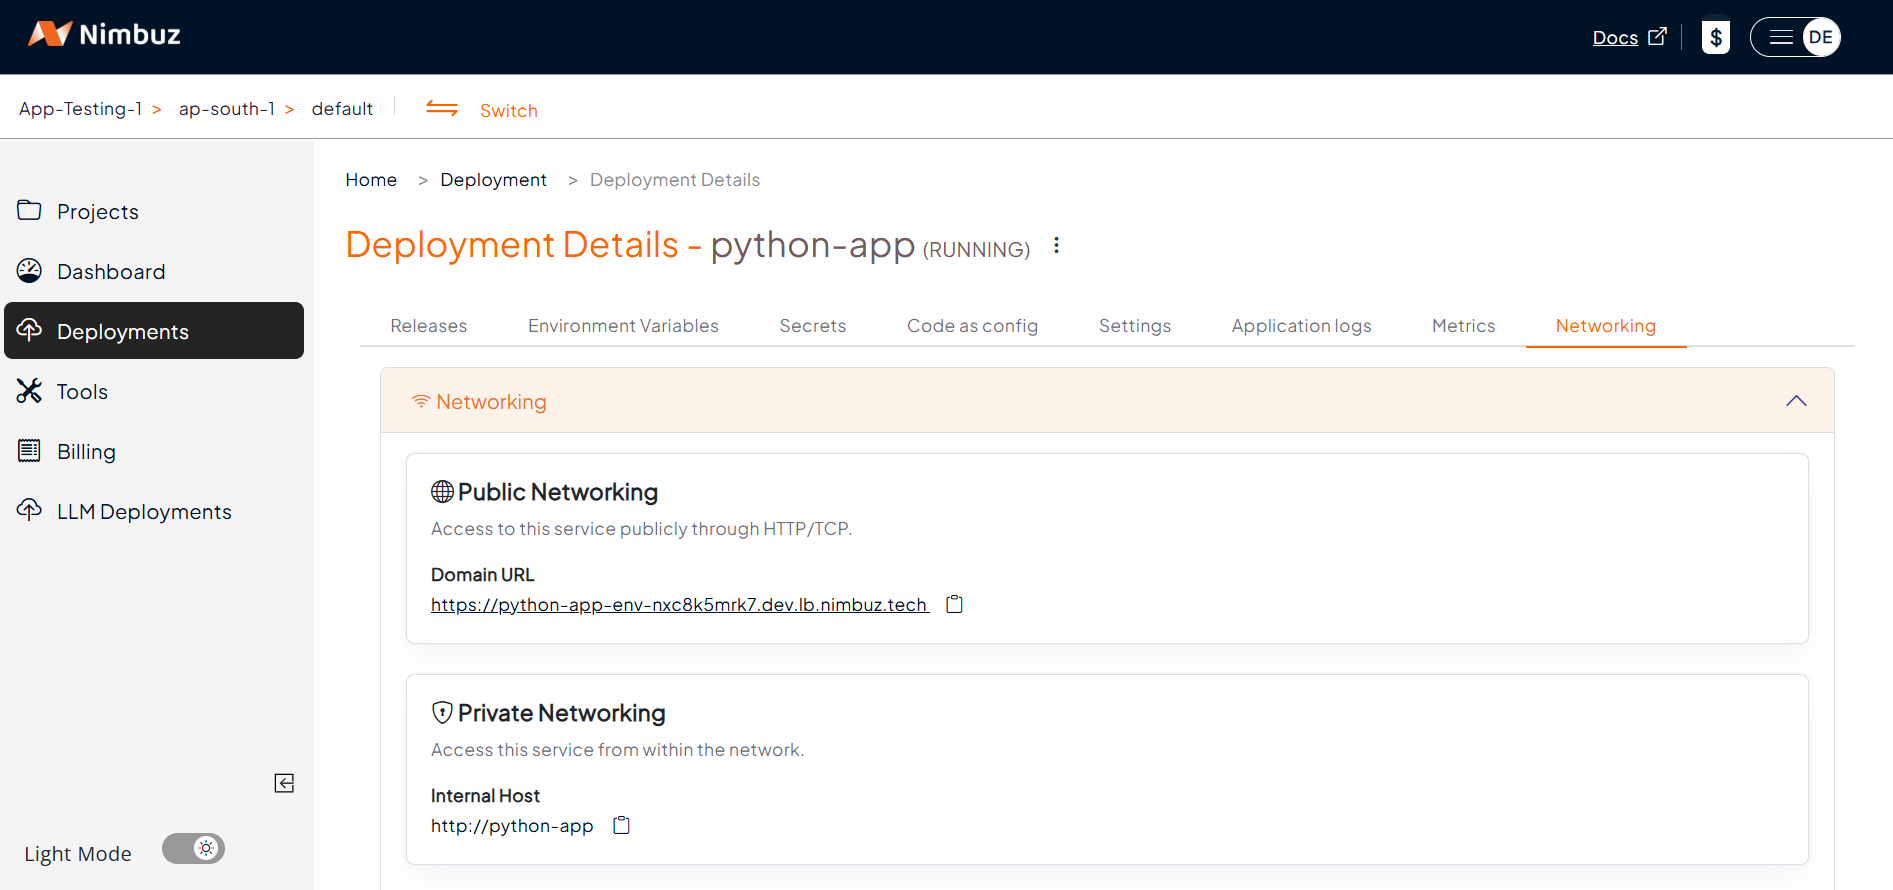
Step 4: Access Your App
- Go to the Networking tab → Click Generate Domain.
- Your app is automatically served with HTTPS.
- Optionally, map a custom domain.
Hosting & Endpoint Setup Compared: AWS vs Nimbuz
When it comes to deploying and hosting a Python application, both AWS EC2 and Nimbuz Platform can get your app online - but the experience is very different.
AWS (EC2):
- Developers must configure hosting manually, including setting up a public IP, domain, load balancer, and routing rules
- SSL setup requires additional steps (such as generating an ACM certificate and binding it to the load balancer).
- You get flexibility, but at the cost of time and complexity.
Result: Time-consuming setup with a higher chance of misconfiguration.
In short: AWS is powerful and flexible, but requires significant manual effort.
Nimbuz Platform:
Nimbuz simplifies the entire hosting process - no terminal commands or manual configure
- When you deploy an app, Nimbuz automatically generates a public endpoint (URL).
- You can enable hosting directly from the dashboard - no need for SSH or load balancers.
- SSL (HTTPS) is enabled by default or can be toggled on with a single click - no certificate setup required.
Result: Zero-effort hosting and instant internet access for your application.
In short: Nimbuz is plug-and-play - deploy, host, and go live in minutes
Simplifying Python Deployment: Nimbuz Platform vs AWS EC2
| Feature | AWS EC2 | Nimbuz Platform |
|---|---|---|
| Deployment | Manual setup via SSH & CLI Install Node.js, Nginx, and run npm install, pm2 start |
1-click deploy from GitHub, GitLab, or Zip Nimbuz auto-handles runtime & build |
| Setup Time | ⏳ ~30-45 mins | ⚡ ~2-3 mins (automated) |
| Server & SSL | Manual config for Node.js, Nginx and Certbot | Auto-configured runtime & built-in HTTPS |
| Monitoring | Setup PM2 / CloudWatch manually | Built-in log viewer & dashboard |
| Scaling | Handled manually (PM2 or AWS Auto Scaling) | Auto-managed by platform |
| Ease of Use | Requires Linux & AWS knowledge | Beginner-friendly UI, no commands |
| Cost | Pay separately for EC2 instance, storage, and SSL. Very high cost with fixed package. | Pay only for the Nimbuz plan - all infrastructure included. Low cost, 40-50% cheaper than AWS. |
| Access URL | http://<IP> or https://domain.com |
https://app.nimbuz.tech or custom domain |
| Conclusion | Flexibility + Complexity + High Cost | Simplicity + Speed + Low Cost |
If you’re deploying an application with simple infrastructure needs and just want to get your app online quickly, the Nimbuz Platform is the best choice for ease of use.