Deploying an Angular Application on AWS vs Nimbuz


Taking your Angular application live requires choosing the right cloud hosting approach. AWS gives you deep control over infrastructure, while Nimbuz Platform focuses on automation and ease of deployment.
In this article, we compare two distinct deployment paths:
- Using Amazon Web Services EC2 to manually configure and manage your server environment
- Using Nimbuz Platform to deploy through a simplified, fully managed interface
Both approaches can successfully host your Angular app but they differ significantly in setup time, technical requirements, and operational effort.
Deploy an Angular Application on AWS EC2
Deploying an Angular application on AWS EC2 is powerful and flexible, but it requires multiple manual steps. From setting up the server to configuring HTTPS, you’ll need to run several commands and manage the environment yourself. Here’s the complete guide:
Step 1: Build Angular Application
Open your project folder.
Run:
ng build --configuration production
After build is complete:
- A
dist/folder will be created. - Inside
dist/your-project-name/you will see built files. - These files are ready for deployment.
Step 2: Launch EC2 Instance
Login to AWS Console.
- Go to EC2 Dashboard
- Click Launch Instance
- Choose Ubuntu Server
- Select t2.micro (Free tier eligible)
- Create or select a Key Pair
- In Security Group:
- Allow HTTP (Port 80)
- Allow SSH (Port 22)
Click Launch Instance
Step 3: Connect to EC2 Server
In your terminal:
ssh -i your-key.pem ubuntu@your-ec2-public-ip
Now you are inside your server.
Step 4: Install Nginx
Update server:
sudo apt update
Install Nginx:
sudo apt install nginx -y
Start Nginx:
sudo systemctl start nginx
Check in browser:
http://your-ec2-public-ip
You should see Nginx welcome page.
Step 5: Upload Angular Build Files
You have two options:
Option 1: Using SCP (Simple way)
From your local system:
scp -i your-key.pem -r dist/your-project-name/* ubuntu@your-ec2-public-ip:/home/ubuntu/
Option 2: Using FileZilla (GUI way)
Upload files to /home/ubuntu/
Step 6: Move Files to Nginx Folder
Inside EC2:
sudo rm -rf /var/www/html/*
sudo mv /home/ubuntu/* /var/www/html/
Step 7: Configure Nginx for Angular (Important)
Edit Nginx config:
sudo nano /etc/nginx/sites-available/default
Replace location / block with:
location / {
    try_files $uri $uri/ /index.html;
}
This is important for Angular routing.
Save and exit.
Restart Nginx:
sudo systemctl restart nginx
Install dependencies:
pip install -r requirements.txt
Step 8: Access Your Application
You can now access your app at http://your-public-ip (Not secure).
Serve Angular App Over HTTPS with SSL
The best practice for production is to run your app securely with HTTPS.
Additionally, we need to follow the following steps for the HTTPS connection.
Step 1: Install Certbot
sudo apt install certbot python3-certbot-nginx -y
Step 2: Run
sudo certbot --nginx
SSL will be enabled for your domain.
Deploy an Angular Application on Nimbuz Platform
Deploying your Angular application has never been easier with a fully UI driven experience. No terminal commands, no server setup, and no complex configurations. Just click, deploy and go live.
Sign up or log in to Nimbuz platform
Here’s a simple, step by step guide to get your app running on Nimbuz:
Step 1: Go to Deployments
- Log in or sign up on Nimbuz platform .
- Navigate to the Deployments section.
- Choose your deployment type:
- Connect Your Code Repository: GitHub or GitLab → Connect account → Pick repo and branch. [OR]
- Upload Zip/Tar File: Just upload your code.
- Configure the app port and instance type.
- Let Nimbuz handle the deployment automatically.

Configure Environment Variables
If your Angular application depends on:
- API base URLs
- Third party service keys
- Runtime configuration values
You can securely configure:
- Environment variables
- Secrets
directly from the deployment configuration page before deployment.
Sensitive data remains secure and is not hardcoded into your source code.
Step 2: Review & Deploy
- Review the deployment details.
- Click Submit to deploy your application and make it live instantly.
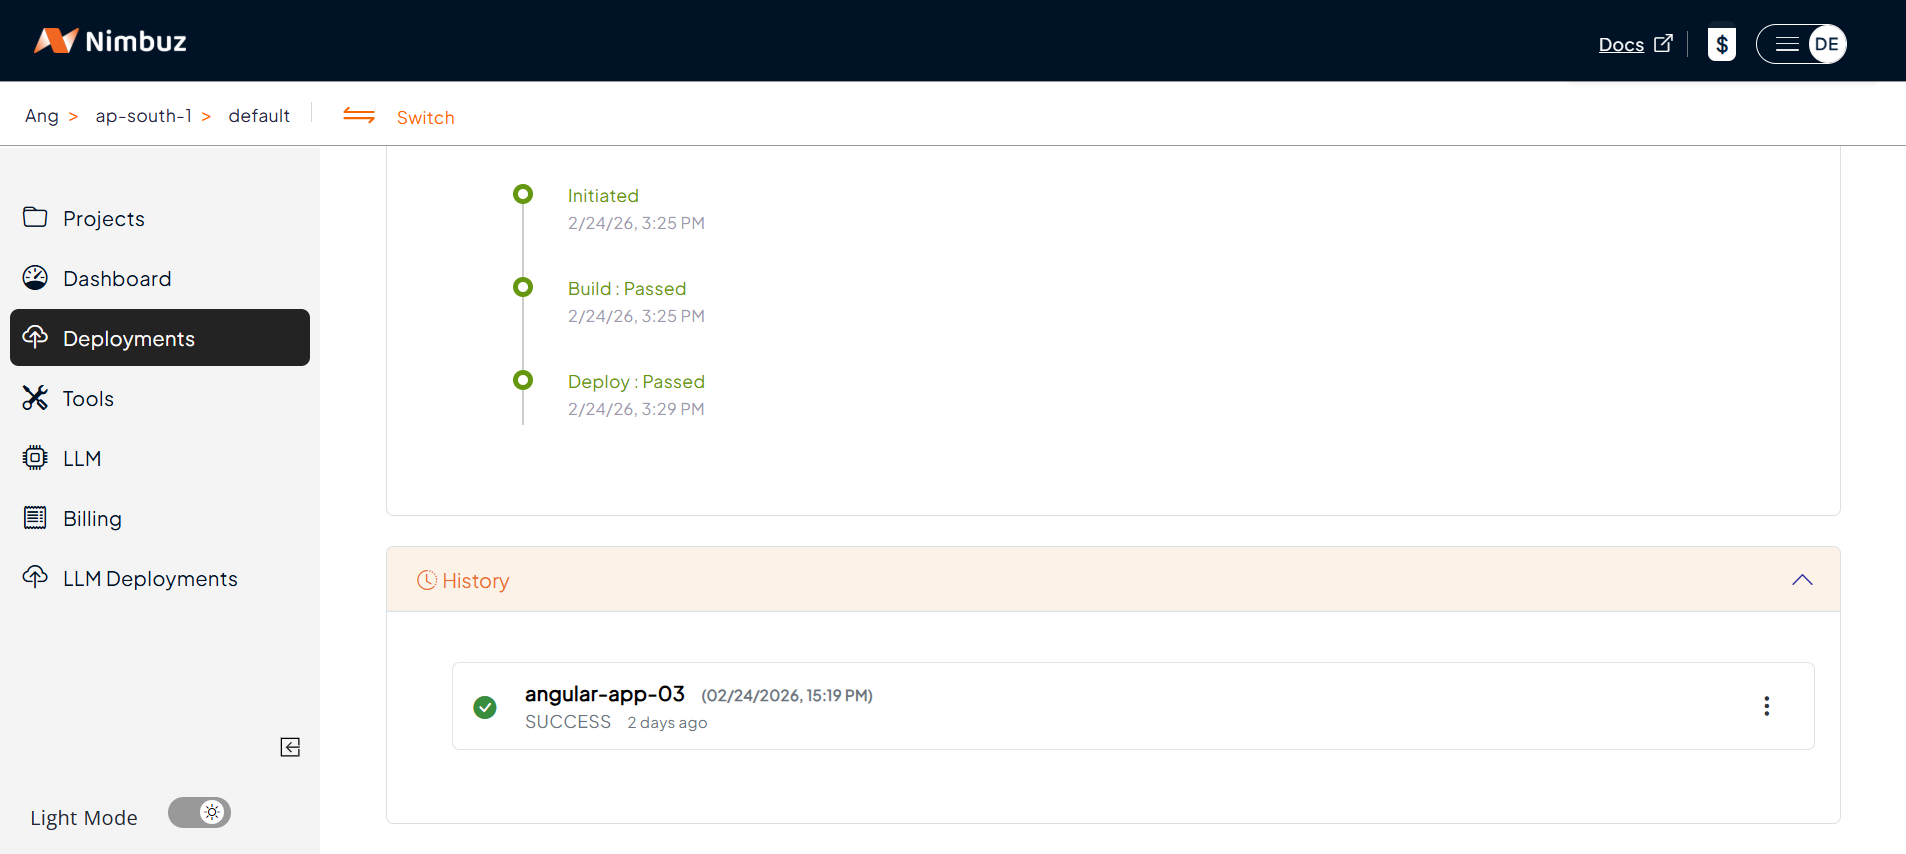
Step 3: Monitor Your App
- View logs, status and recent releases directly in the UI.
- No SSH or terminal required.
Step 4: Access Your App
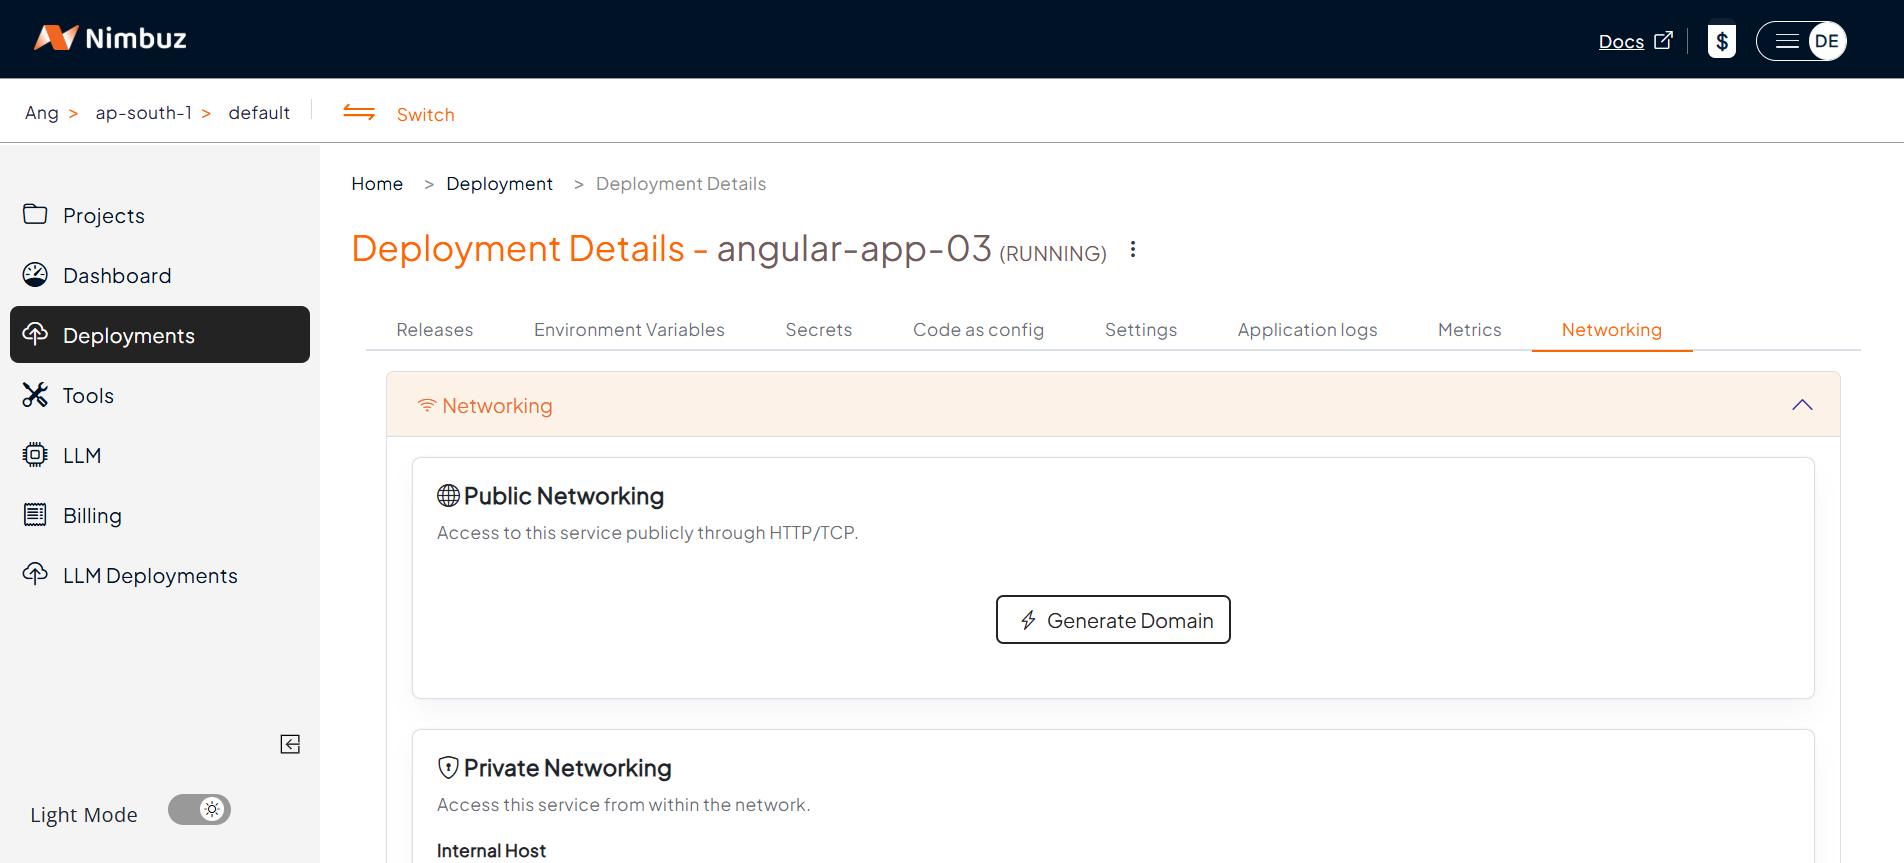
- Go to the Networking tab → Click Generate Domain.
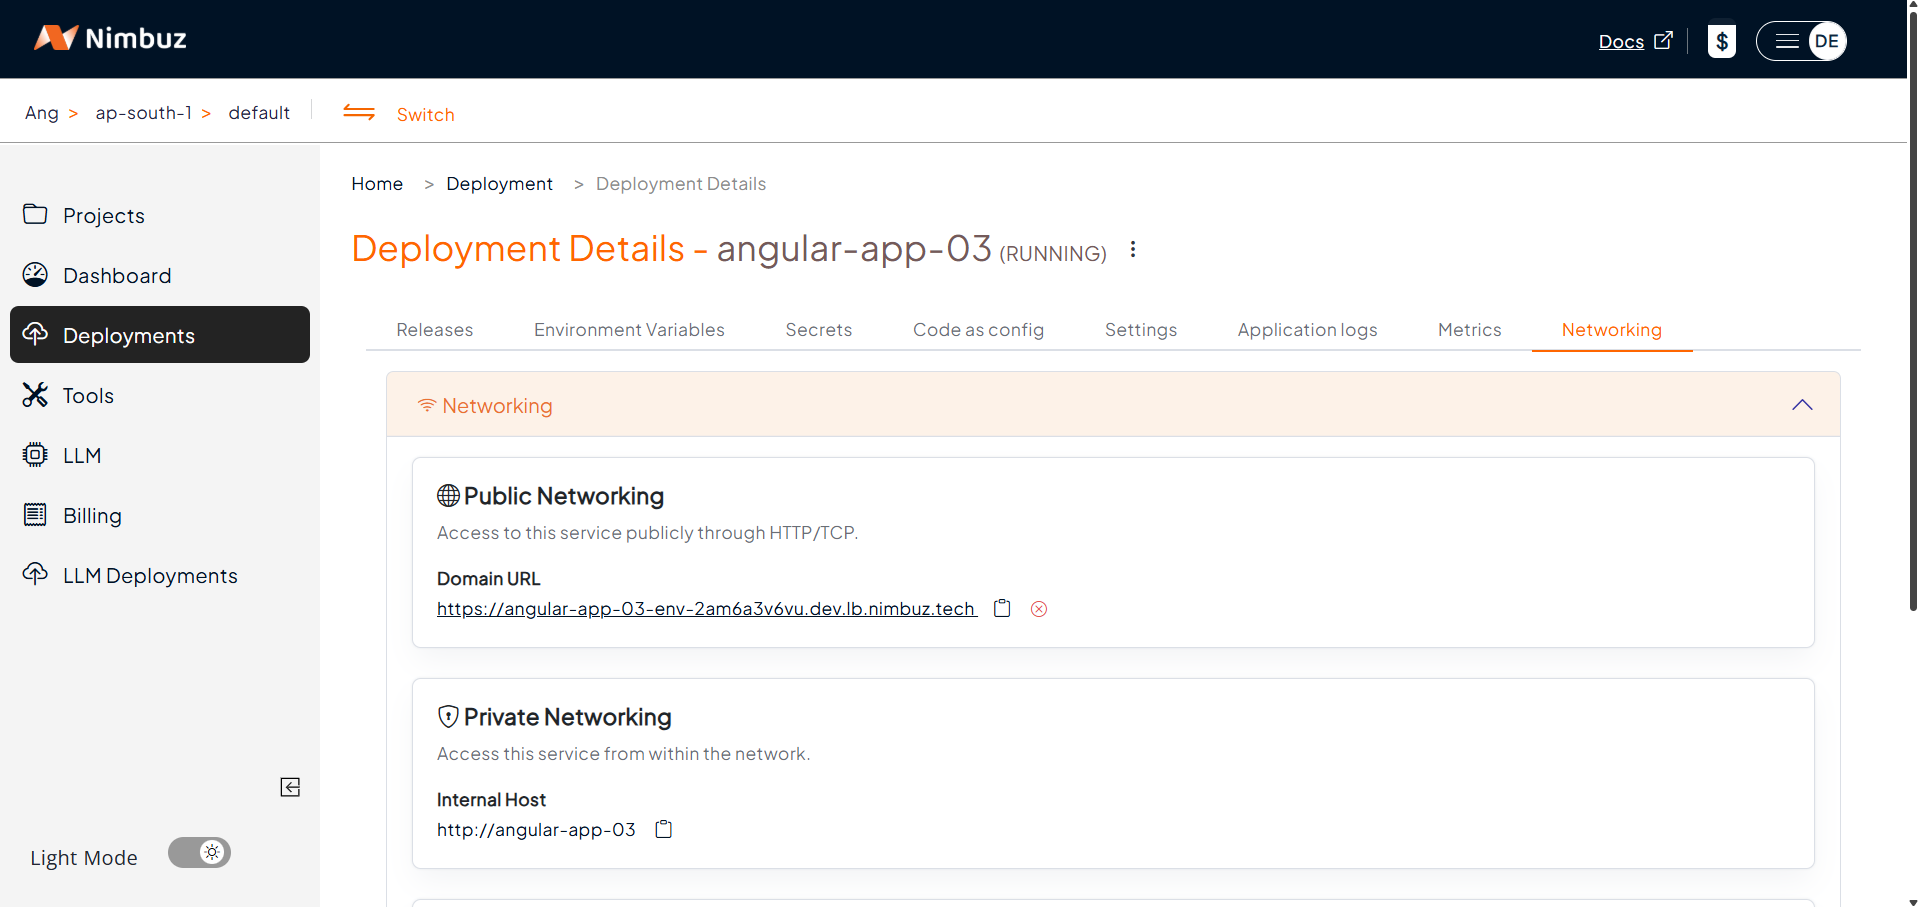
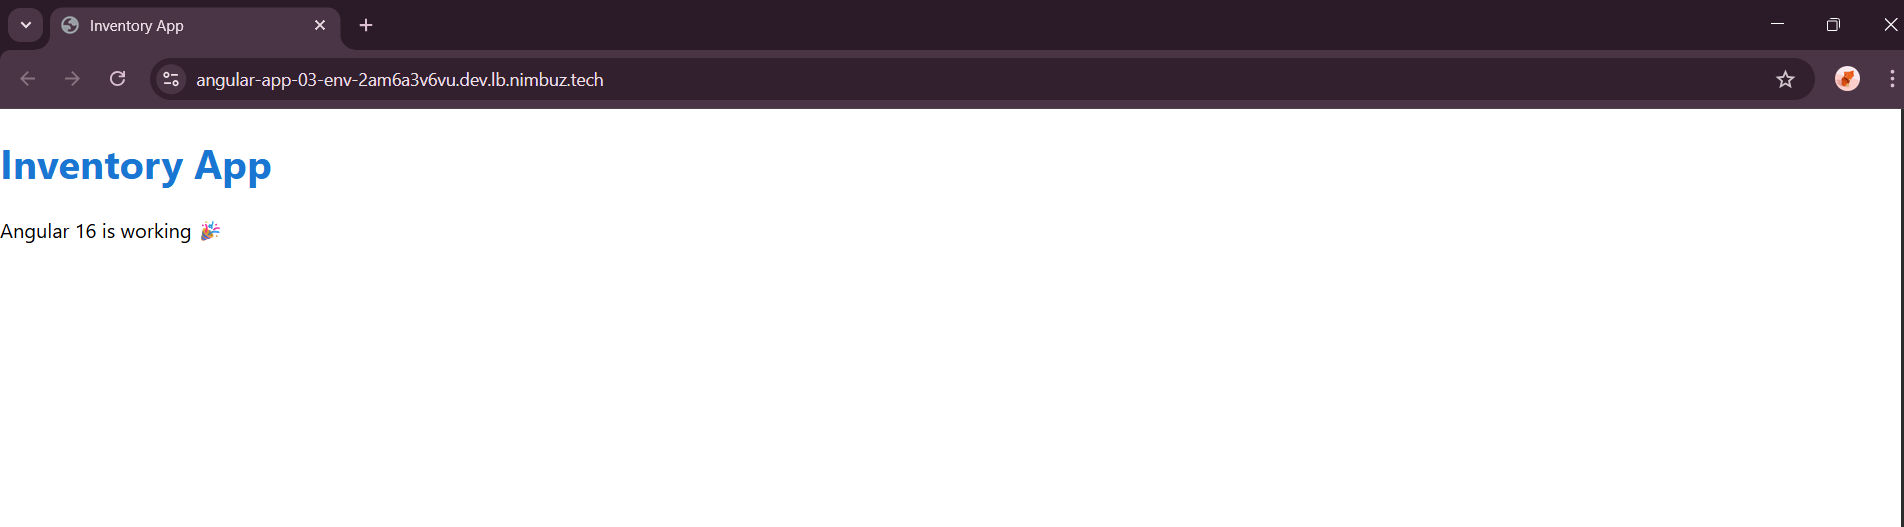
- After clicking Generate Domain, the system generates a public endpoint.
- Your app is automatically served with HTTPS.
- Optionally, map a custom domain.
Hosting & Endpoint Setup Compared: AWS vs Nimbuz
When it comes to deploying and hosting an Angular application, both AWS EC2 and Nimbuz Platform can get your app online but the experience is very different.
AWS (EC2):
- Developers must configure hosting manually, including setting up a public IP, domain, load balancer, and routing rules
- SSL setup requires additional steps (such as generating an ACM certificate and binding it to the load balancer).
- You get flexibility, but at the cost of time and complexity.
Result: Time consuming setup with a higher chance of misconfiguration.
In short: AWS is powerful and flexible, but requires significant manual effort.
Nimbuz Platform:
Nimbuz simplifies the entire hosting process with no terminal commands or manual configuration required.
- when you deploy an app, with few clicks Nimbuz generates a public endpoint(URL).
- You can enable hosting directly from the portal, with no need for SSH or load balancers.
- Generate your domain with a single click and Nimbuz instantly provisions a secure public HTTPS endpoint with no SSL certificate setup required.
Result: Zero effort hosting and instant internet access for your application.
In short: Nimbuz is plug and play, deploy, host and go live in minutes.
Simplifying Angular Deployment: Nimbuz Platform vs AWS EC2
| Feature | AWS EC2 | Nimbuz Platform |
|---|---|---|
| Deployment | Manual setup via SSH & CLI Install Node.js, Nginx, and run npm install, pm2 start |
1 click deploy from GitHub, GitLab, or Zip Nimbuz auto handles runtime & build |
| Setup Time | ⏳ ~30 to 45 mins | ⚡ ~2 to 3 mins (automated) |
| Server & SSL | Manual config for Node.js, Nginx and Certbot | Auto configured runtime & built in HTTPS |
| Monitoring | Setup PM2 / CloudWatch manually | Built in log viewer & portal |
| Scaling | Handled manually (PM2 or AWS Auto Scaling) | Auto managed by platform |
| Ease of Use | Requires Linux & AWS knowledge | Beginner friendly UI, no commands |
| Cost | Pay separately for EC2 instance, storage, and SSL. Very high cost with fixed package. | Pay only for the Nimbuz plan, with all infrastructure included. Low cost, 40 to 50% cheaper than AWS. |
| Access URL | http://<IP> or https://domain.com |
http://<app-name>.nimbuz.tech or custom domain |
| Conclusion | Flexibility + Complexity + High Cost | Simplicity + Speed + Low Cost |
Conclusion
If you value full infrastructure control and are comfortable managing servers, SSL certificates, and scaling policies, AWS EC2 provides flexibility at the cost of additional operational effort.
If you prefer faster time to market, simplified hosting, and a fully managed deployment workflow, Nimbuz Platform delivers a modern, developer friendly alternative.