How Custom Domains & DNS Work in Nimbuz

When you deploy an application on Nimbuz, it’s instantly accessible using a default domain provided by the platform.
But for production use, branding, or customer-facing apps, most teams prefer using their own custom domain (like app.yourcompany.com).
This guide explains:
- How domains and DNS work traditionally
- How Nimbuz simplifies custom domain mapping
- How to connect your existing domain (GoDaddy, Route 53, DreamHost, etc.) to a Nimbuz deployment
How Domains and DNS Work (Traditional Explanation)
A domain name (example: example.com) is a human-readable address for your application.
DNS (Domain Name System) is what maps that domain to the actual server where your app runs.
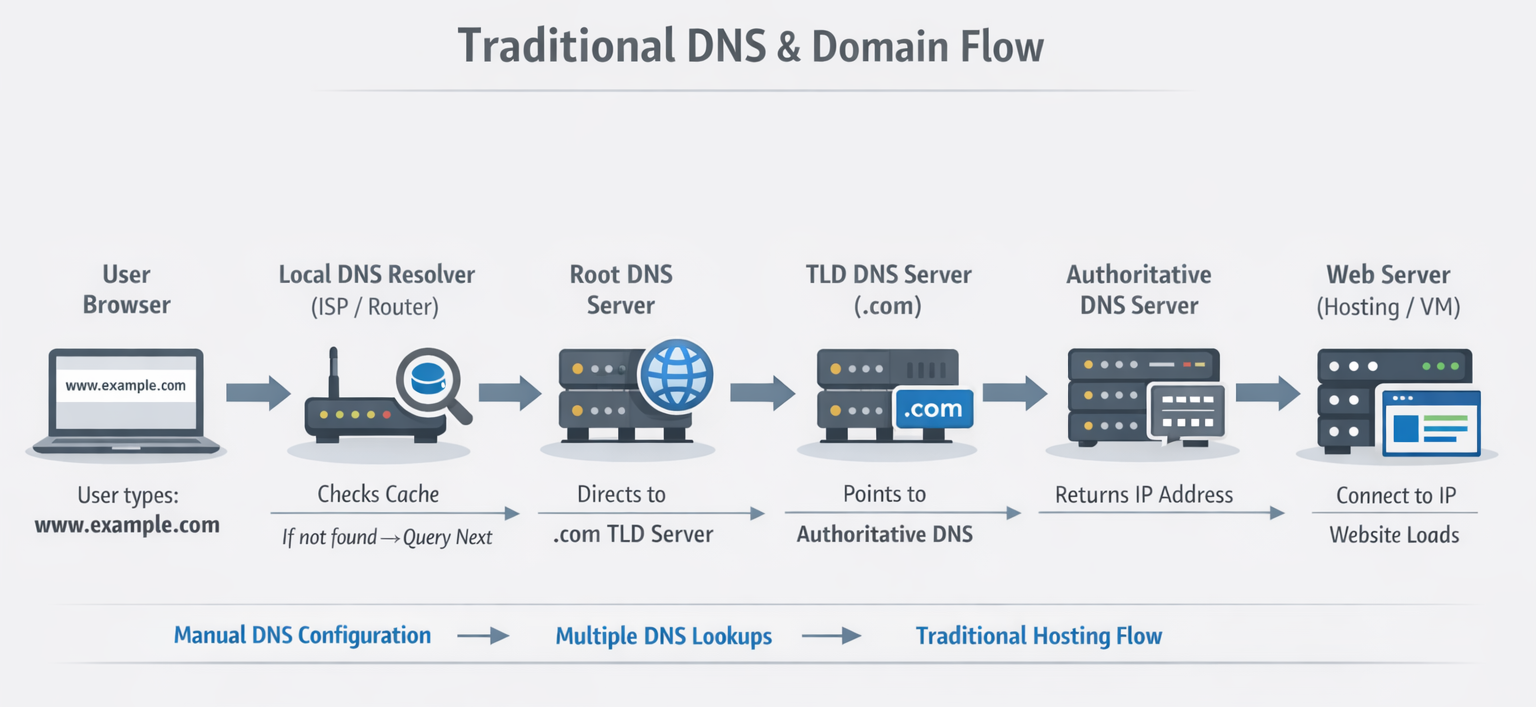
Traditionally, the flow looks like this:
- A user types
app.example.comin the browser - DNS checks the records for that domain
- DNS points the domain to a server (IP or another domain)
- The request reaches your application
Managing this manually usually means:
- Handling DNS records
- Managing SSL certificates
- Waiting for propagation
- Debugging misconfigurations
Default Domain in Nimbuz
Every application deployed on Nimbuz automatically gets a default DNS URL, such as:
your-app.nimbuz.app
This allows you to:
- Access your app immediately
- Test deployments
- Avoid DNS setup during early development
No DNS configuration is required for the default domain.
Custom Domain Support in Nimbuz
Nimbuz allows you to map your own domain to a deployed application using CNAME records.
You keep full ownership of your domain, and Nimbuz handles the routing securely.
Supported DNS Providers
You can use any DNS provider, including:
- GoDaddy
- AWS Route 53
- DreamHost
- Cloudflare
- Google Domains
- Any standard DNS service
How Custom DNS Mapping Works in Nimbuz
The process is intentionally simple.
Step 1: Deploy Your Application
Deploy your app on Nimbuz as usual.
Once deployed, Nimbuz provides a target URL for DNS mapping.
Step 2: Create a CNAME Record in Your DNS Provider
Go to your domain provider’s DNS settings and create a CNAME record:
| Field | Value |
|---|---|
| Record Type | CNAME |
| Host / Name | app or www |
| Target | Nimbuz-provided URL |
| TTL | Default |
Example:
app.example.com → your-app.nimbuz.app
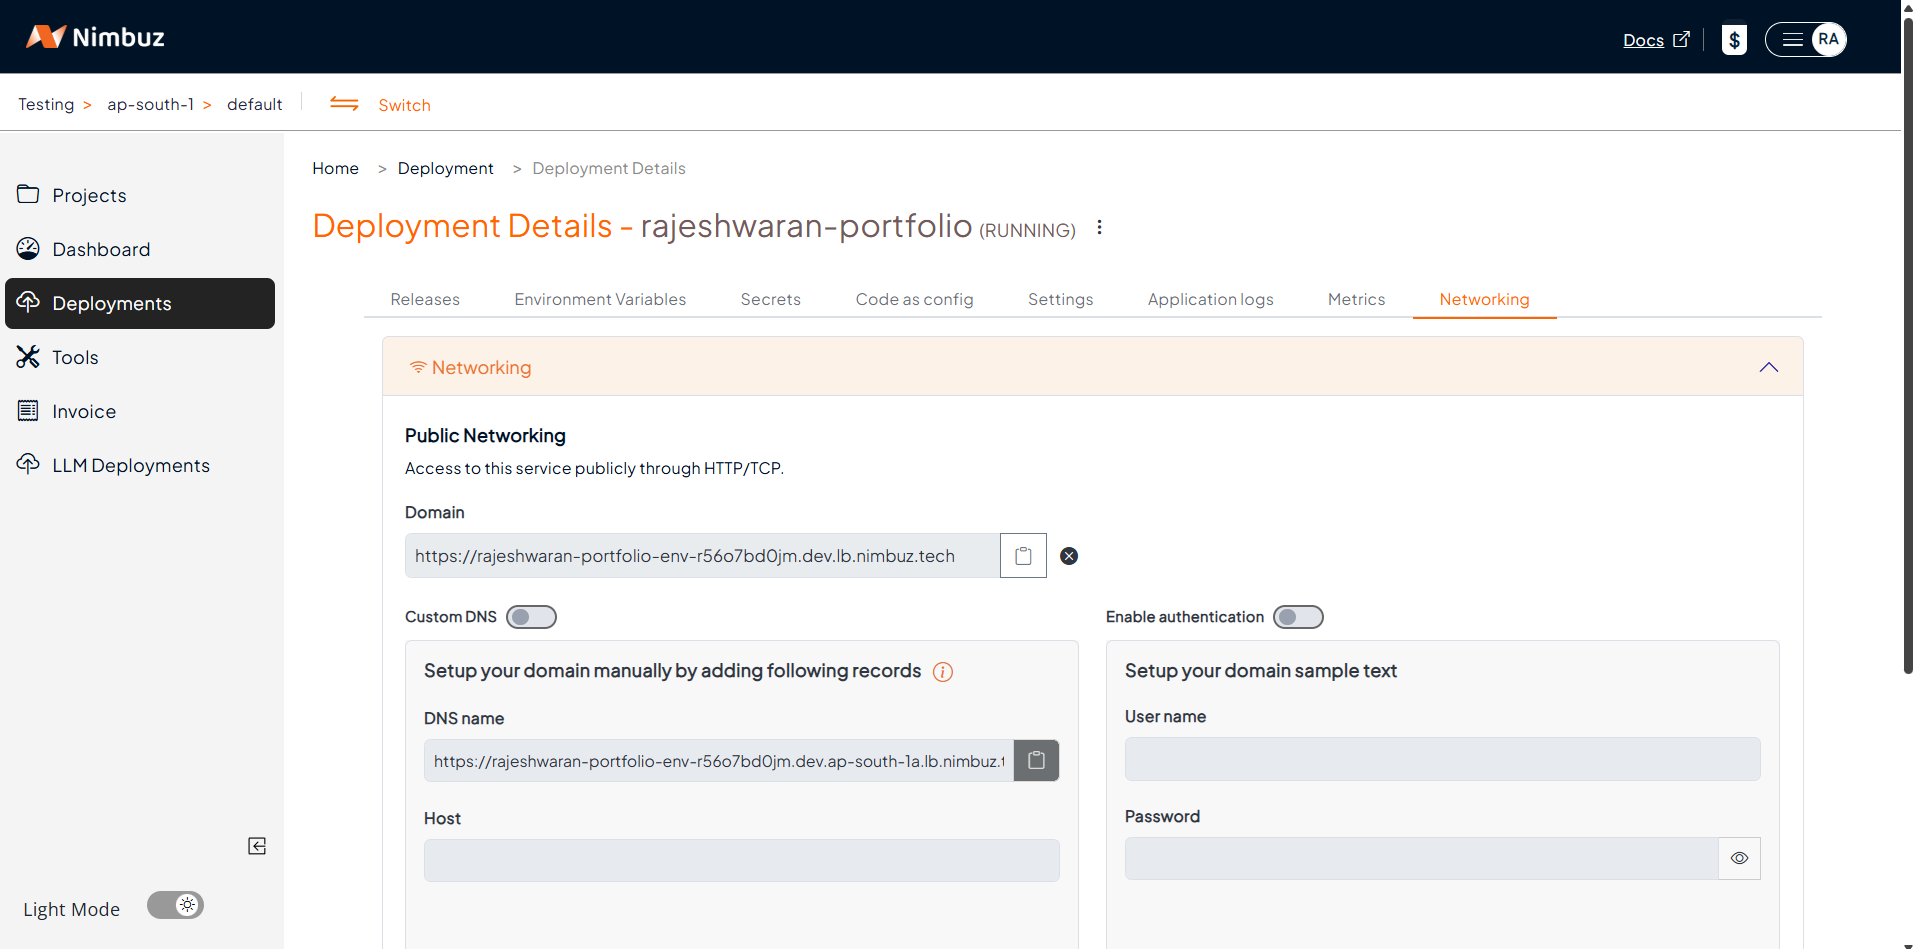
Step 3: Enable Custom DNS in Nimbuz
Inside Nimbuz Dashboard:
- Open your deployment
- Go to the Networking tab
- Enable Custom DNS
- Enter your domain name (example:
app.example.com) - Save changes

Step 4: DNS Propagation (2–3 Minutes)
Nimbuz automatically verifies the DNS mapping.
⏱️ Within 2–3 minutes, your custom domain becomes live.
No manual SSL setup.
No certificates to manage.
No complex networking steps.
What Nimbuz Handles for You
Once the domain is mapped, Nimbuz automatically manages:
- Secure routing to your application
- HTTPS / SSL certificates
- Traffic handling
- Zero-downtime mapping
For HTTPS / SSL Refer the blog
You focus on your app , not DNS complexity.
Traditional DNS vs Nimbuz DNS Mapping
| Traditional Setup | Nimbuz Setup |
|---|---|
| Manual DNS + SSL | Automatic |
| Complex configs | Simple toggle |
| Multiple tools | Single dashboard |
| Longer setup time | 2–3 minutes |
When Should You Use Custom Domains?
Custom DNS is ideal when:
- Launching production apps
- Hosting customer-facing services
- Branding your application
- Migrating from another cloud or platform
Final Thoughts
Nimbuz removes the usual pain of domain and DNS configuration.
With:
- A default domain for instant access
- Easy CNAME-based custom DNS
- Built-in security and SSL
You can go from deployment to live custom domain in minutes.
Try Nimbuz Today!
Experience seamless app deployment with Nimbuz. No more manual setup - just focus on building.