Deploying React with Webpack on AWS vs Nimbuz

Building a React application with Webpack ensures optimized, production-ready assets. But once the code is bundled, the real challenge begins: where to deploy it?
On one side, AWS EC2 offers full control but demands manual setup from provisioning servers and configuring Nginx to handling SSL, monitoring, and scaling with load balancers. This flexibility comes at the cost of time and complexity.
On the other, Nimbuz abstracts away infrastructure. Deployment is reduced to a single upload or Git connect, with auto-SSL, built-in monitoring, and seamless scaling already in place.
Both can host production ready React applications, but the developer experience and operational overhead are vastly different.
Let’s examine how deployments work on each platform and why Nimbuz is emerging as a practical alternative for modern teams.
Key Technical Aspects of Deployment Components:
React: Component-driven library for efficient, reusable, and scalable UI development.
Webpack: Module bundler that optimizes, splits, and delivers production-ready assets.
Node.js: JavaScript runtime with npm ecosystem, essential for build and deployment workflows.
Deploying React with Webpack on AWS (EC2-Instance)
AWS EC2 offers flexibility and granular control but comes at the cost of complexity. A typical deployment workflow for a React Webpack application involves:
Prerequisites
- A React app that builds to a static folder (build/ or dist/).
- An AWS account with permission to create EC2, Security Groups, and (optional) Route 53.
Launch an EC2 Instance
- Go to the AWS Management Console.
- Launch a new EC2 instance (Ubuntu, Linux).
- Configure security groups to allow SSH (port 22), HTTP (80) and HTTPS (443).
Launch and note the Public IPv4 address.
Ssh into ec2-instance
ssh -i <path-to-ssh-key> ubuntu@<ec2-public-ip>
Exit
Copy the React-app files from local system to ec2-instance
Scp -i  <path-to-ssh-key>  -r
<application_path> ubuntu@<ec2-public-ip> :/home/ubuntu/
Again ssh into ec2-instance
ssh -i <path-to-ssh-key> ubuntu@<ec2-public-ip>
Inside the project folder,

Install Node.js & npm
ubuntu@<ec2-public-ip> :~/nimbuz-webpack-app$
sudo apt update
sudo apt install nodejs npm –y
Install dependencies
npm install Build your React/Webpack app
npm run build This will create a production-ready build (build/ folder depending on your webpack config).

Install Nginx
sudo apt update
sudo apt install nginx –y
Copy your React build into Nginx web root
sudo rm -rf /var/www/html/*
sudo cp -r /home/ubuntu/nimbuz-webpack-app/build/* /var/www/html/
Start and enable Nginx
sudo systemctl start nginx
sudo systemctl enable nginx
Check Nginx status
systemctl status nginx 
Open your site in browser
http://<your-ec2-public-ip> The outcome is a working deployment, but each step introduces operational responsibilities. Every upgrade, security patch, or scaling event requires manual intervention or additional AWS services.
Deploying React with Webpack on Nimbuz
Nimbuz approaches deployment differently, focusing on simplicity and speed without compromising scalability. Instead of provisioning infrastructure, developers only need to package their build artifacts and upload them.
A typical workflow looks like this:
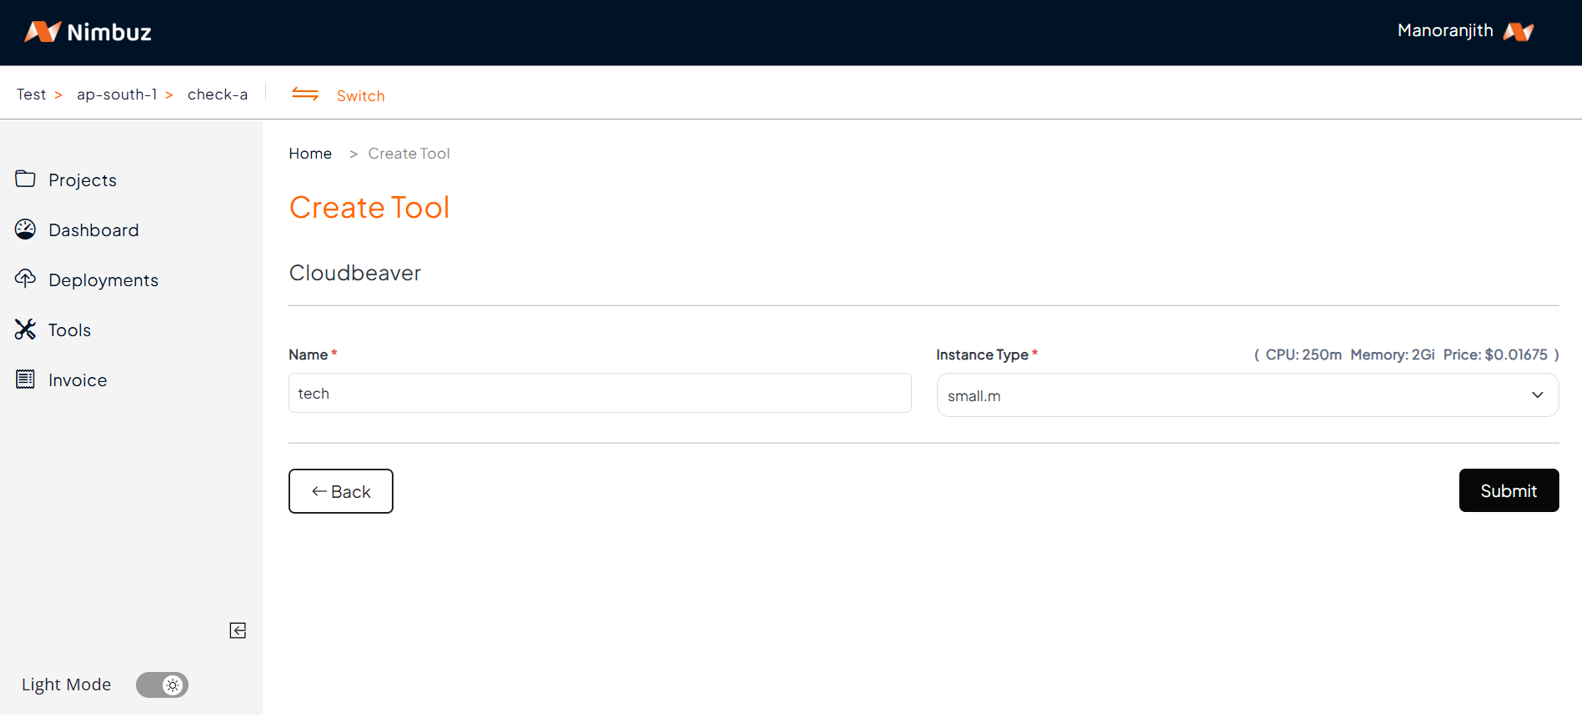
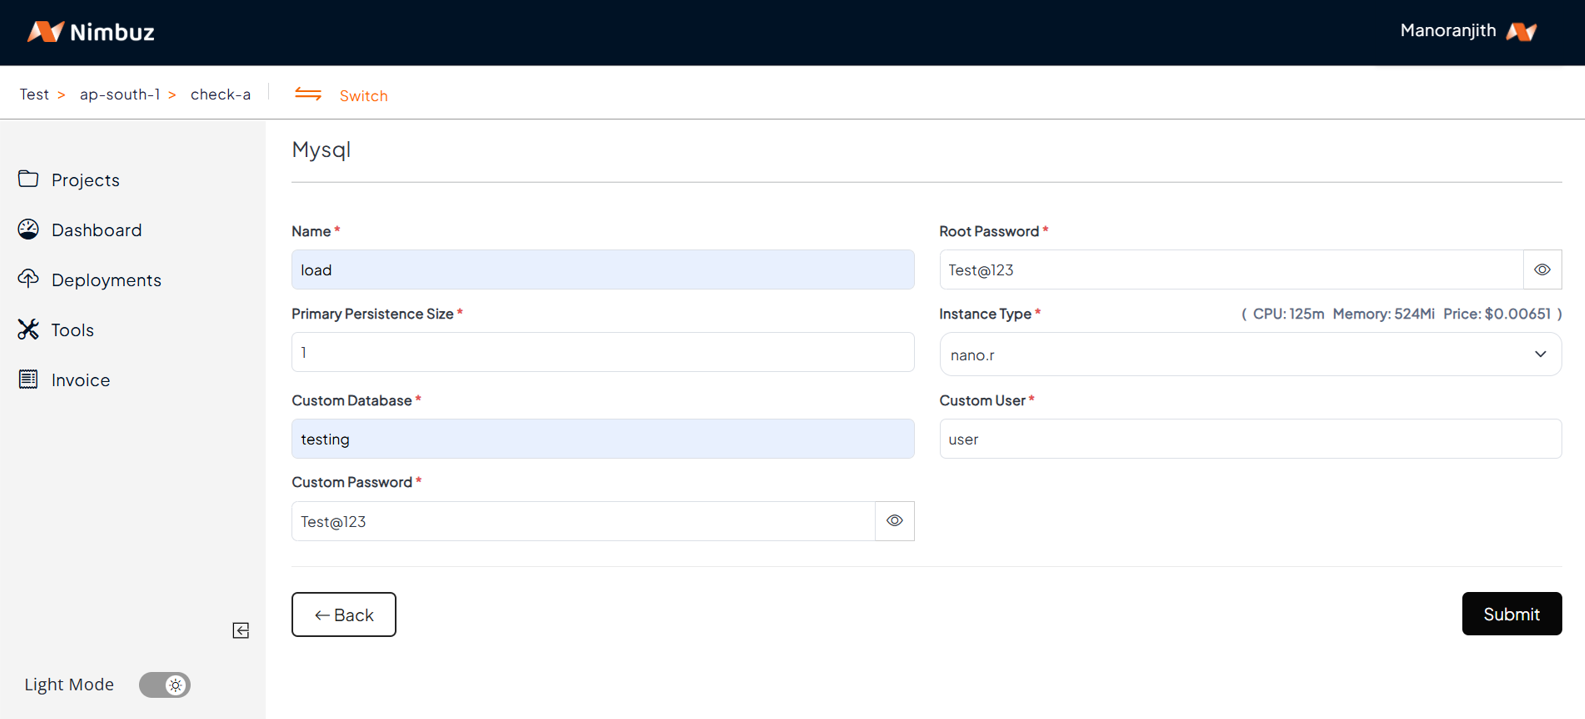
Sign up or log in to Nimbuz platform
Create a Project and Environment – environments (such as Development, Staging, Production) provide isolation and clear organization.
Upload as ZIP/Connect with GitHub/Gitlab – compress the folder into a single ZIP file and upload it directly from the dashboard or by connecting the repo.
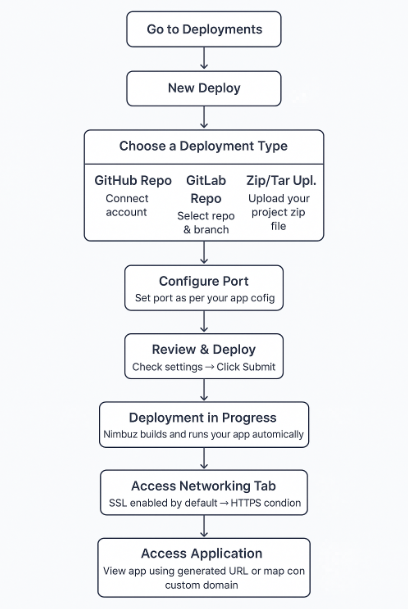
Configure Environment Variables & Secrets – API keys or runtime values can be securely injected without modifying the code.
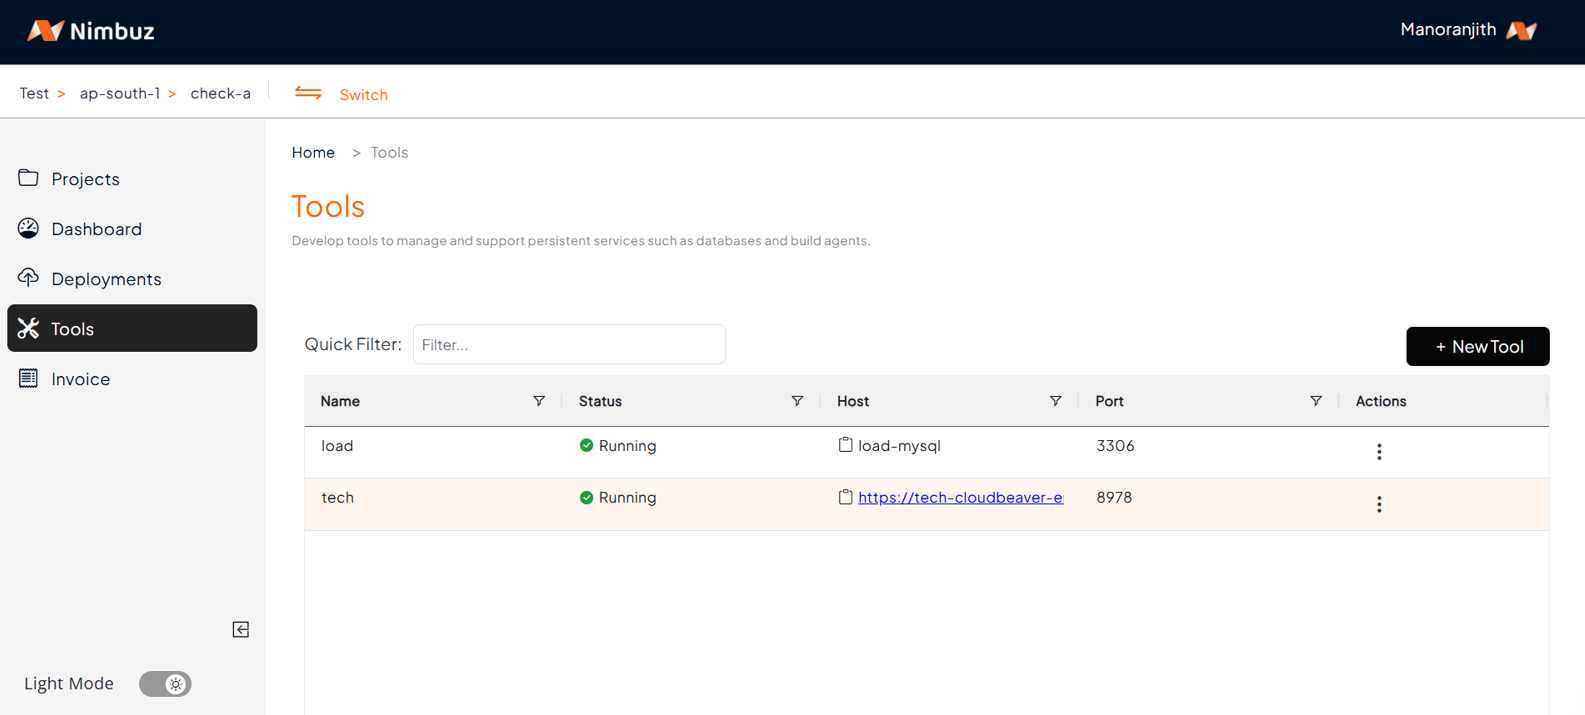
Deploy and Test – once submitted, Nimbuz provisions resources automatically, makes the app live on a preview URL, and allows immediate testing.

Monitor logs, status, and latest release
Enable Public Access – generate a public domain with SSL enabled by default. No additional server setup is required.
A production ready React + Webpack app is now live on Nimbuz! 🎉 with HTTPS and monitoring built in.
Why AWS Feels Heavy for React Deployments vs Nimbuz is Effortless
| Category | AWS EC2 | Nimbuz |
|---|---|---|
| Setup & Deployment | Complex process: provision instance, configure security groups, install Node.js/Nginx. | One-click deployment from upload or Git.No server setup needed. |
| Domain & SSL | Manual DNS configuration, Certbot install, certificate renewals. | One-click domain mapping with auto-SSL, no CLI or renewals. |
| Scaling | Requires ELB + Auto Scaling Groups, often difficult to tune. | Auto-scaling built-in, adapts instantly to traffic spikes. |
| Monitoring | Requires setting up CloudWatch, creating dashboards, and configuring alerts, which adds complexity. | Built-in monitoring & logs, visible from the dashboard. |
| Cost & Billing | Multiple services (EC2, ELB, CloudWatch, bandwidth) and costs unpredictable. | Transparent, predictable pricing with free tier options. |
| Developer Experience | High learning curve, more time on infra than coding. | Developer-friendly platform, focus stays on coding. |
Final Thoughts
Deploying React with Webpack shouldn’t be a server headache.
AWS EC2 gives control but requires manual setup, SSL management, scaling, and monitoring as all are time-consuming.
Whereas Nimbuz Highlights:
⚡ One-Click Deployment from Git or upload
🔒 Auto SSL + Domain mapping
📈 Built-in scaling for traffic spikes
📊 Integrated monitoring
💰 Transparent, predictable pricing
💻 Developer-First Experience